As with everything else, photographic postprocessing is subject to trends. One specific trend, which was kick-started by smart phone apps such as Hipstamatic and Instagram, is what I would call “retro-grunge”: a warm retro colour palette, slightly desaturated and mixed with grungy, worn-out finishing with lots of local contrast that really let structures and textures shine through. In the following tutorial, I'll show you how to recreate this effect using Lightroom.
1. The preparation.
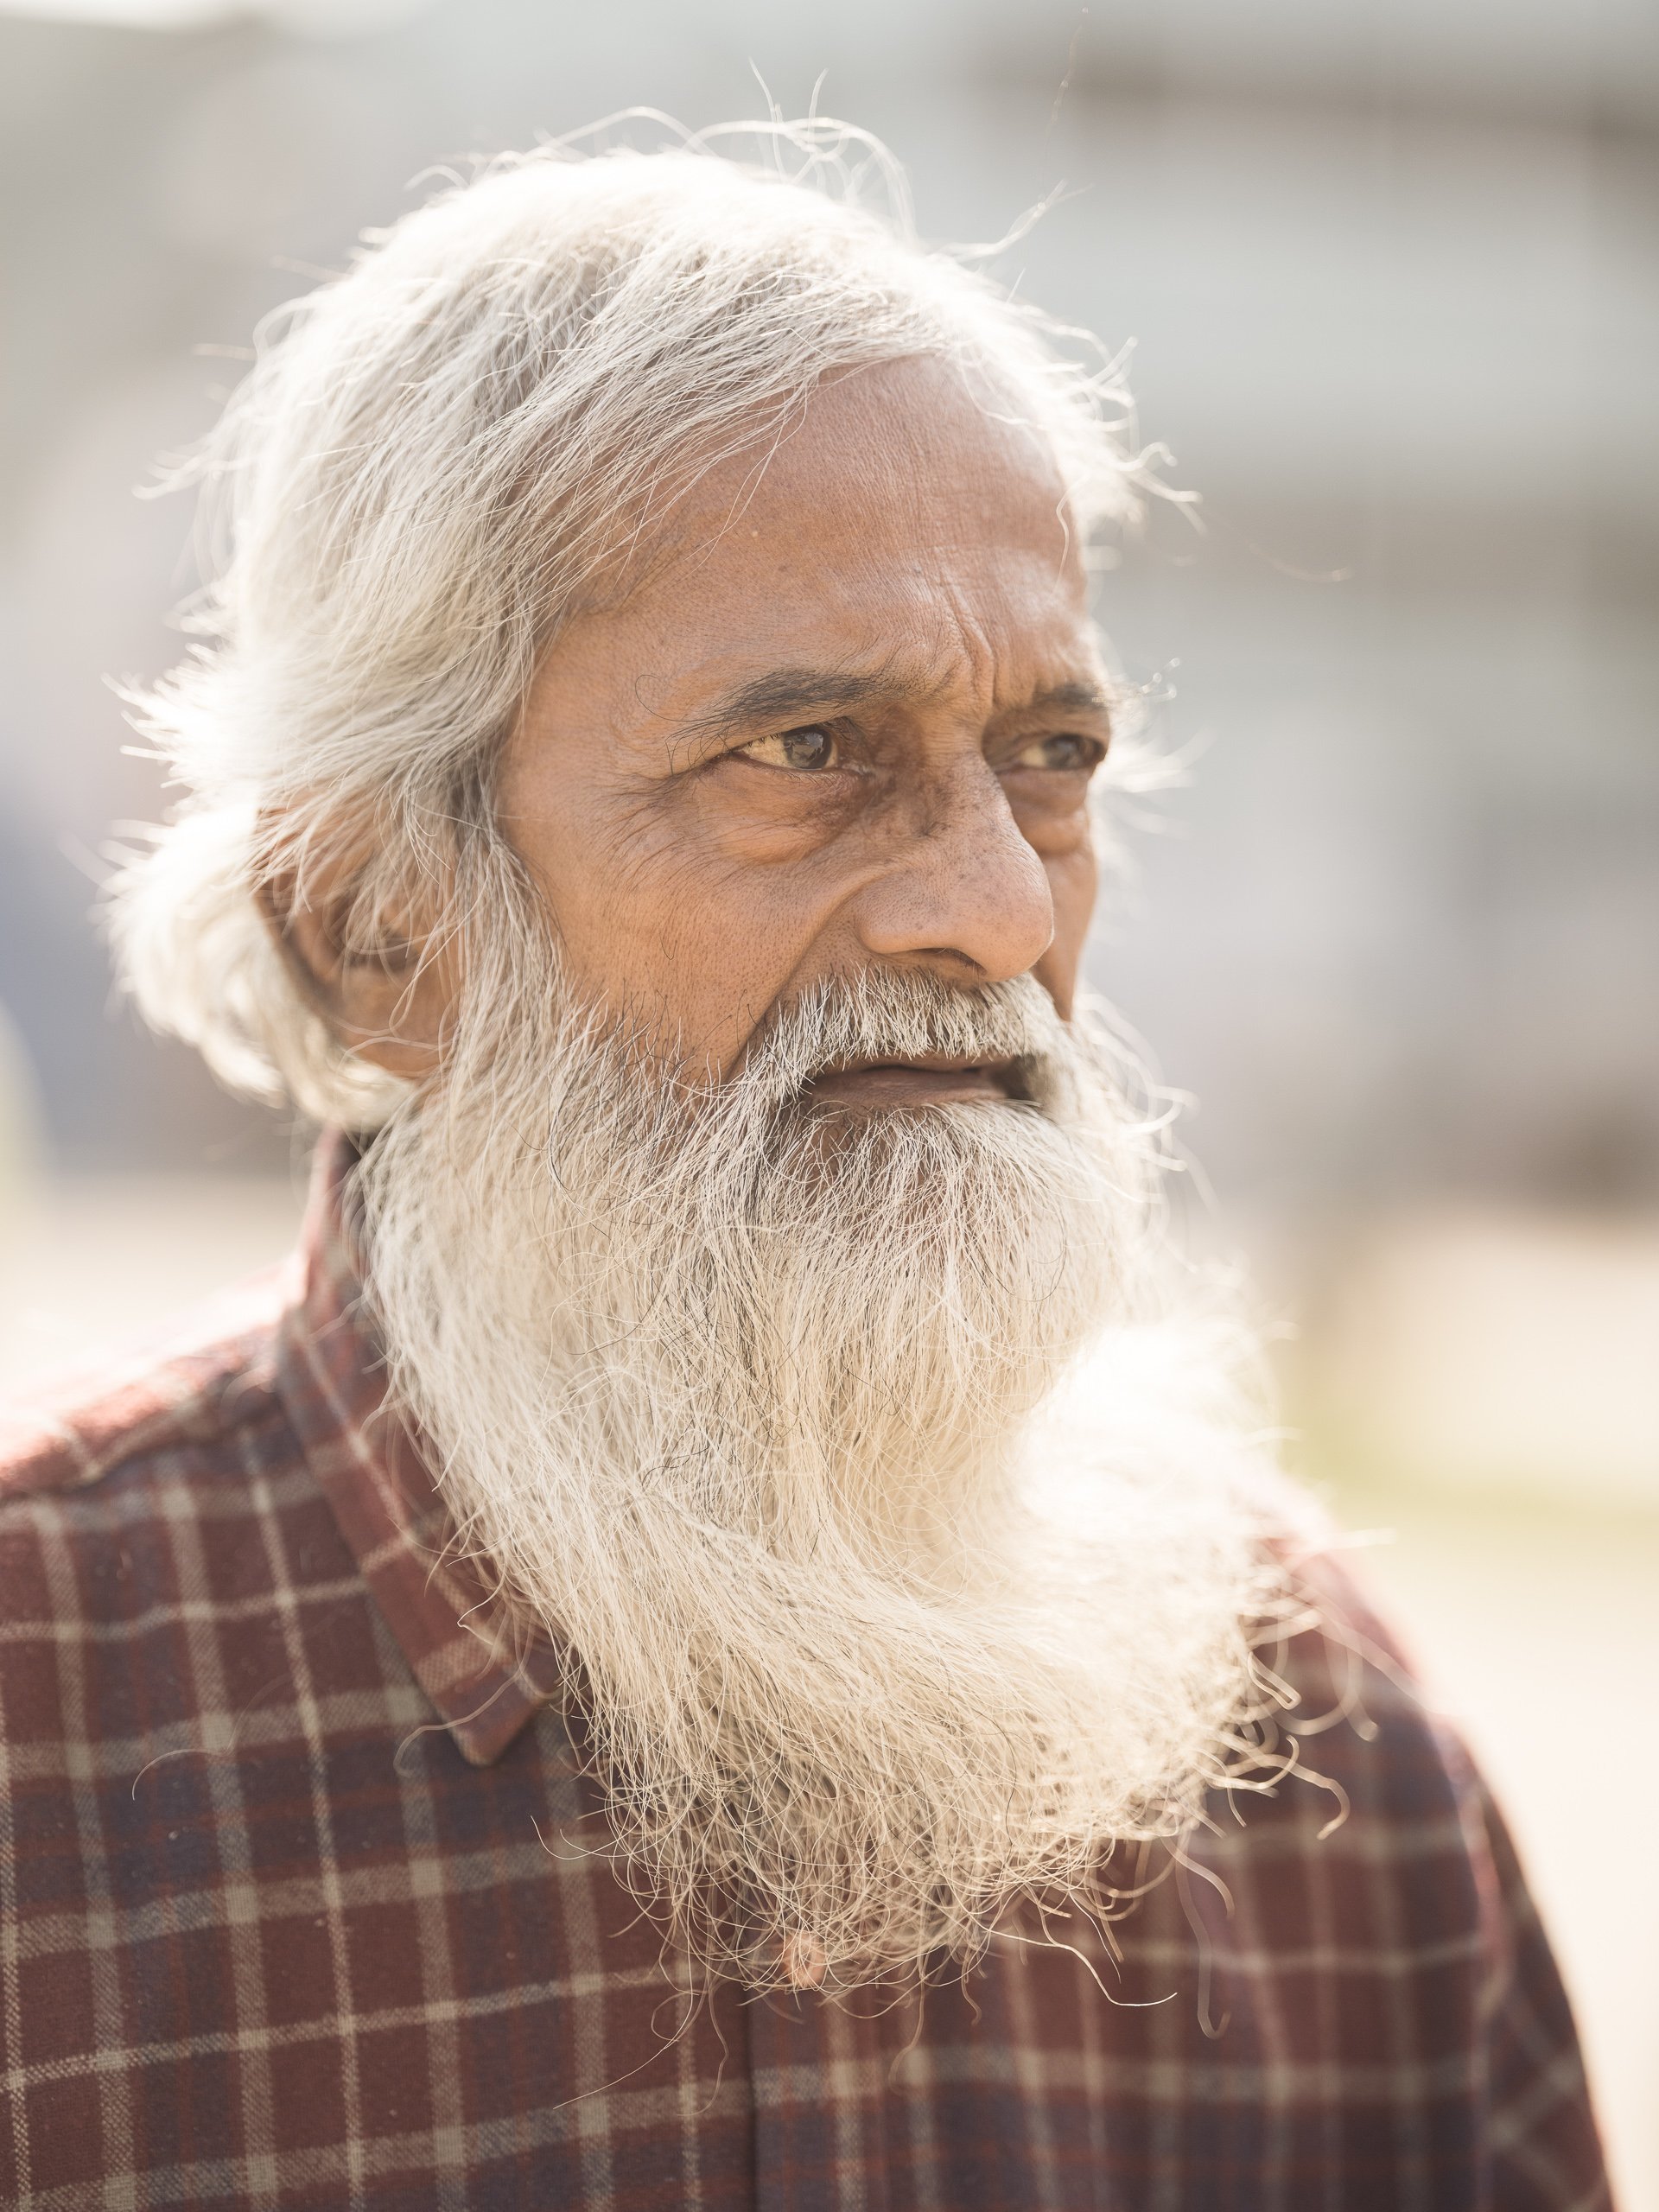
My image was heavily underexposed but that's not a problem for Lightroom.
You should always photograph with your post-processing in mind. In this case, I combined sunlight and flashlight in a cross lighting setup in order to render my subject in a three-dimensional way. The image is underexposed but that doesn’t matter that much as long as the mix between ambient and flashlight is OK. And anyway, my flashes just couldn’t go any stronger.
2 Basic corrections.

The 'grungy look' is all about negative Highlights, positive Shadows and lots of Clarity.
I selected the Auto Lens Corrections checkbox and increased the Exposure in the Basic panel to +1.15, simply because the image was underexposed. So, this specific correction is not part of the look we want to achieve. The following PV2012 settings are typical for the “grungy” look we’re after: negative values for Blacks and high positive
values for Shadows, in this case -20 and +100 respectively. I also bumped the Clarity slider up (+50) as it accentuates textures and structures. To create the worn out look, I lowered Saturation to -55 and increased Vibrance to +15. I reduced Contrastbecause the other edits had already increased it more than enough.
3 Editing colours in the HSL panel.

The HSL Panel really rocks because it lets you tweak different colours' Brightness, Saturation and Hue without having to select anything!
Of all Lightroom panels, the HSL / Color / B & W panel is undeniably my favourite (apart from the Basic panel of course). You can use it to tweak colours without having to resort to the Adjustment Brush. In this image, I increased the Saturation of Green(+45) and Blue (+40) because the global desaturation in the Basic panel had made these colours too pale. I also dragged the blue channel’s Hue 25 units to the left making it more like a bluish green. Finally, I increased the Luminance of blue to +20.
4 More colour tweaking in the Split Toning panel.

Split Toning is one way to give a colour image a vintage look.
You can adjust colours not only in the HSL panel, but also in the Split Toning panel.
I chose a warm Hue (55) for the highlights and a cool one (230) for the Shadows. Both Saturation sliders allow you to dial in the strength of the effect: I chose 33 and 10
respectively.
5 The Effects panel: vignetting and grain, your digital thickener!

A Vignette helps to pull the eye of the viewer towards the center of the image.
It’s common to finish images like this off with a vignette. I also added some grain. Not only does this look nicely retro, it also is done for a practical reason: if you post-process images really hard, you might degrade image quality, causing certain parts to disintegrate more than others. In order to restore some uniformity into the way your pixels look, you can use grain as 'digital thickener'.
6 Finishing off with local adjustments.

Some local adjustments help to make the image really shine.
This image was finished with three local adjustments: a graduated filter starting from the bottom right corner set to positive Clarity and negative Highlights to accentuate the concrete even more, a brush with negative Exposure and negative Highlights to tone down the disturbingly bright triangle under the skate and finally a brush with positive Shadows and positive Exposure to further lighten up the skater somewhat.
7 Saving your work as a develop preset.

Never do the same work twice in Lightroom. Instead, turn your efforts into a preset!
Of course, you can save this look as a preset so you can apply it to other comparable images. It’s important to only select the effects that are indispensable for the look you are after, not the adjustments that were unique to this image (such as the exposure increase in step 2).
8 Applying to other images.

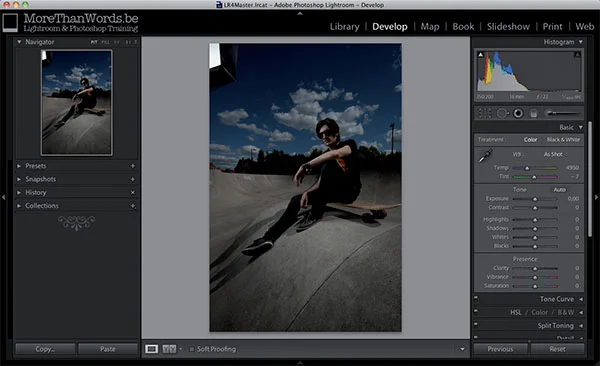
The great thing about Lightroom presets is that you can preview them in the Navigator Panel. So you only click and apply them when the preview looks nice.
The nice thing about presets is that you can quickly apply them to other images. The Navigator window at the top of the Develop module’s left panel already gives you a clue as to how the image would look with that effect applied to it. Of course, the more the image resembles the original image in terms of tonality and atmosphere, the better the effect will be.
Sometimes, you have to tweak the result slightly, but still, presets can not only save you lots of time, they can also make images that were shot at entirely different moments in entirely different locations visually match, which can be a good thing if you want to use these images together in a photo album or an exhibition.
This is only one way to create such a vintage effect. By experimenting or Googling 'Lightroom vintage preset' you can find lots more. I quite like Kevin Kubota’s Vintage Delish set of Lightroom presets and if you're more into the faded vintage look, then I absolutely recommend Stu Maschwitz' Prolost Bespoke Vintage presets. If you're into black and white images, check out my Lightroom Black & White preset package.
9 Alternatives.
If you don’t have the patience for this technique, or if all you want is ready-to-go solutions to achieve these kinds of effects, there is a slew of plug-ins that can help you.
- Alien Skin Exposure and DxO FilmPack are specifically aimed at simulating old analog films.
- Color Efex Pro 4 by Nik Software and Perfect Effects by onOne Software offer these kinds of looks as a subset of a larger array of filters and effects.

This blogpost is an adapted excerpt from my Lightroom 5 Up to Speed eBook, which offers over 300 pages of Lightroom training content. For a limited time, you can get Lightroom 5 Unmasked and my latest eBook, Lightroom 6 Up to Speed at a 25 percent discount. Get the bundle from the product page.