In this video, I compare Photoshop’s new Super Resolution feature with a dedicated plug-in, Gigapixel AI. You’ll see me upsample a 3 megapixel image to 50 megapixel. That’s 4 times the length and width or 16 times the surface. I’ll also let you in on a little secret on how to actually do this with Super Resolution, as it’s normally only meant to enlarge images to 4 times the surface.
If you are interested in adding Gigapixel AI to your digital toolbox after watching this video, then I have some good news! Until May 7, Gigapixel is on sale for only 79.99 USD instead of 99.99 USD. Even better… coupon code MTW15 gives you an extra 15% off!
Do you have some extra budget? Then perhaps consider the Topaz Image Quality Bundle. This is a bundle with not only Gigapixel AI, but also Denoise AI and Sharpen AI. These tools tackle blur and noise respectively and are at least as impressive as Gigapixel. The full bundle normally costs 259.99 USD but it’s also on sale for 149.99 USD until May 7 and you can use my coupon code MTW15 for an additional 15% off. Highly recommended!
Affliate disclaimer: the links on this page are affiliate links. MoreThanWords receives a commission when you use the links on this page. This helps me to keep this site running and keep on creating free content and webinars in addition to the paid tutorials. It is important to know that this commission does not increase your cost. On the contrary, if you use my links and my discount code MTW15 upon discount, you’ll actually pay less than someone who checks out directly.

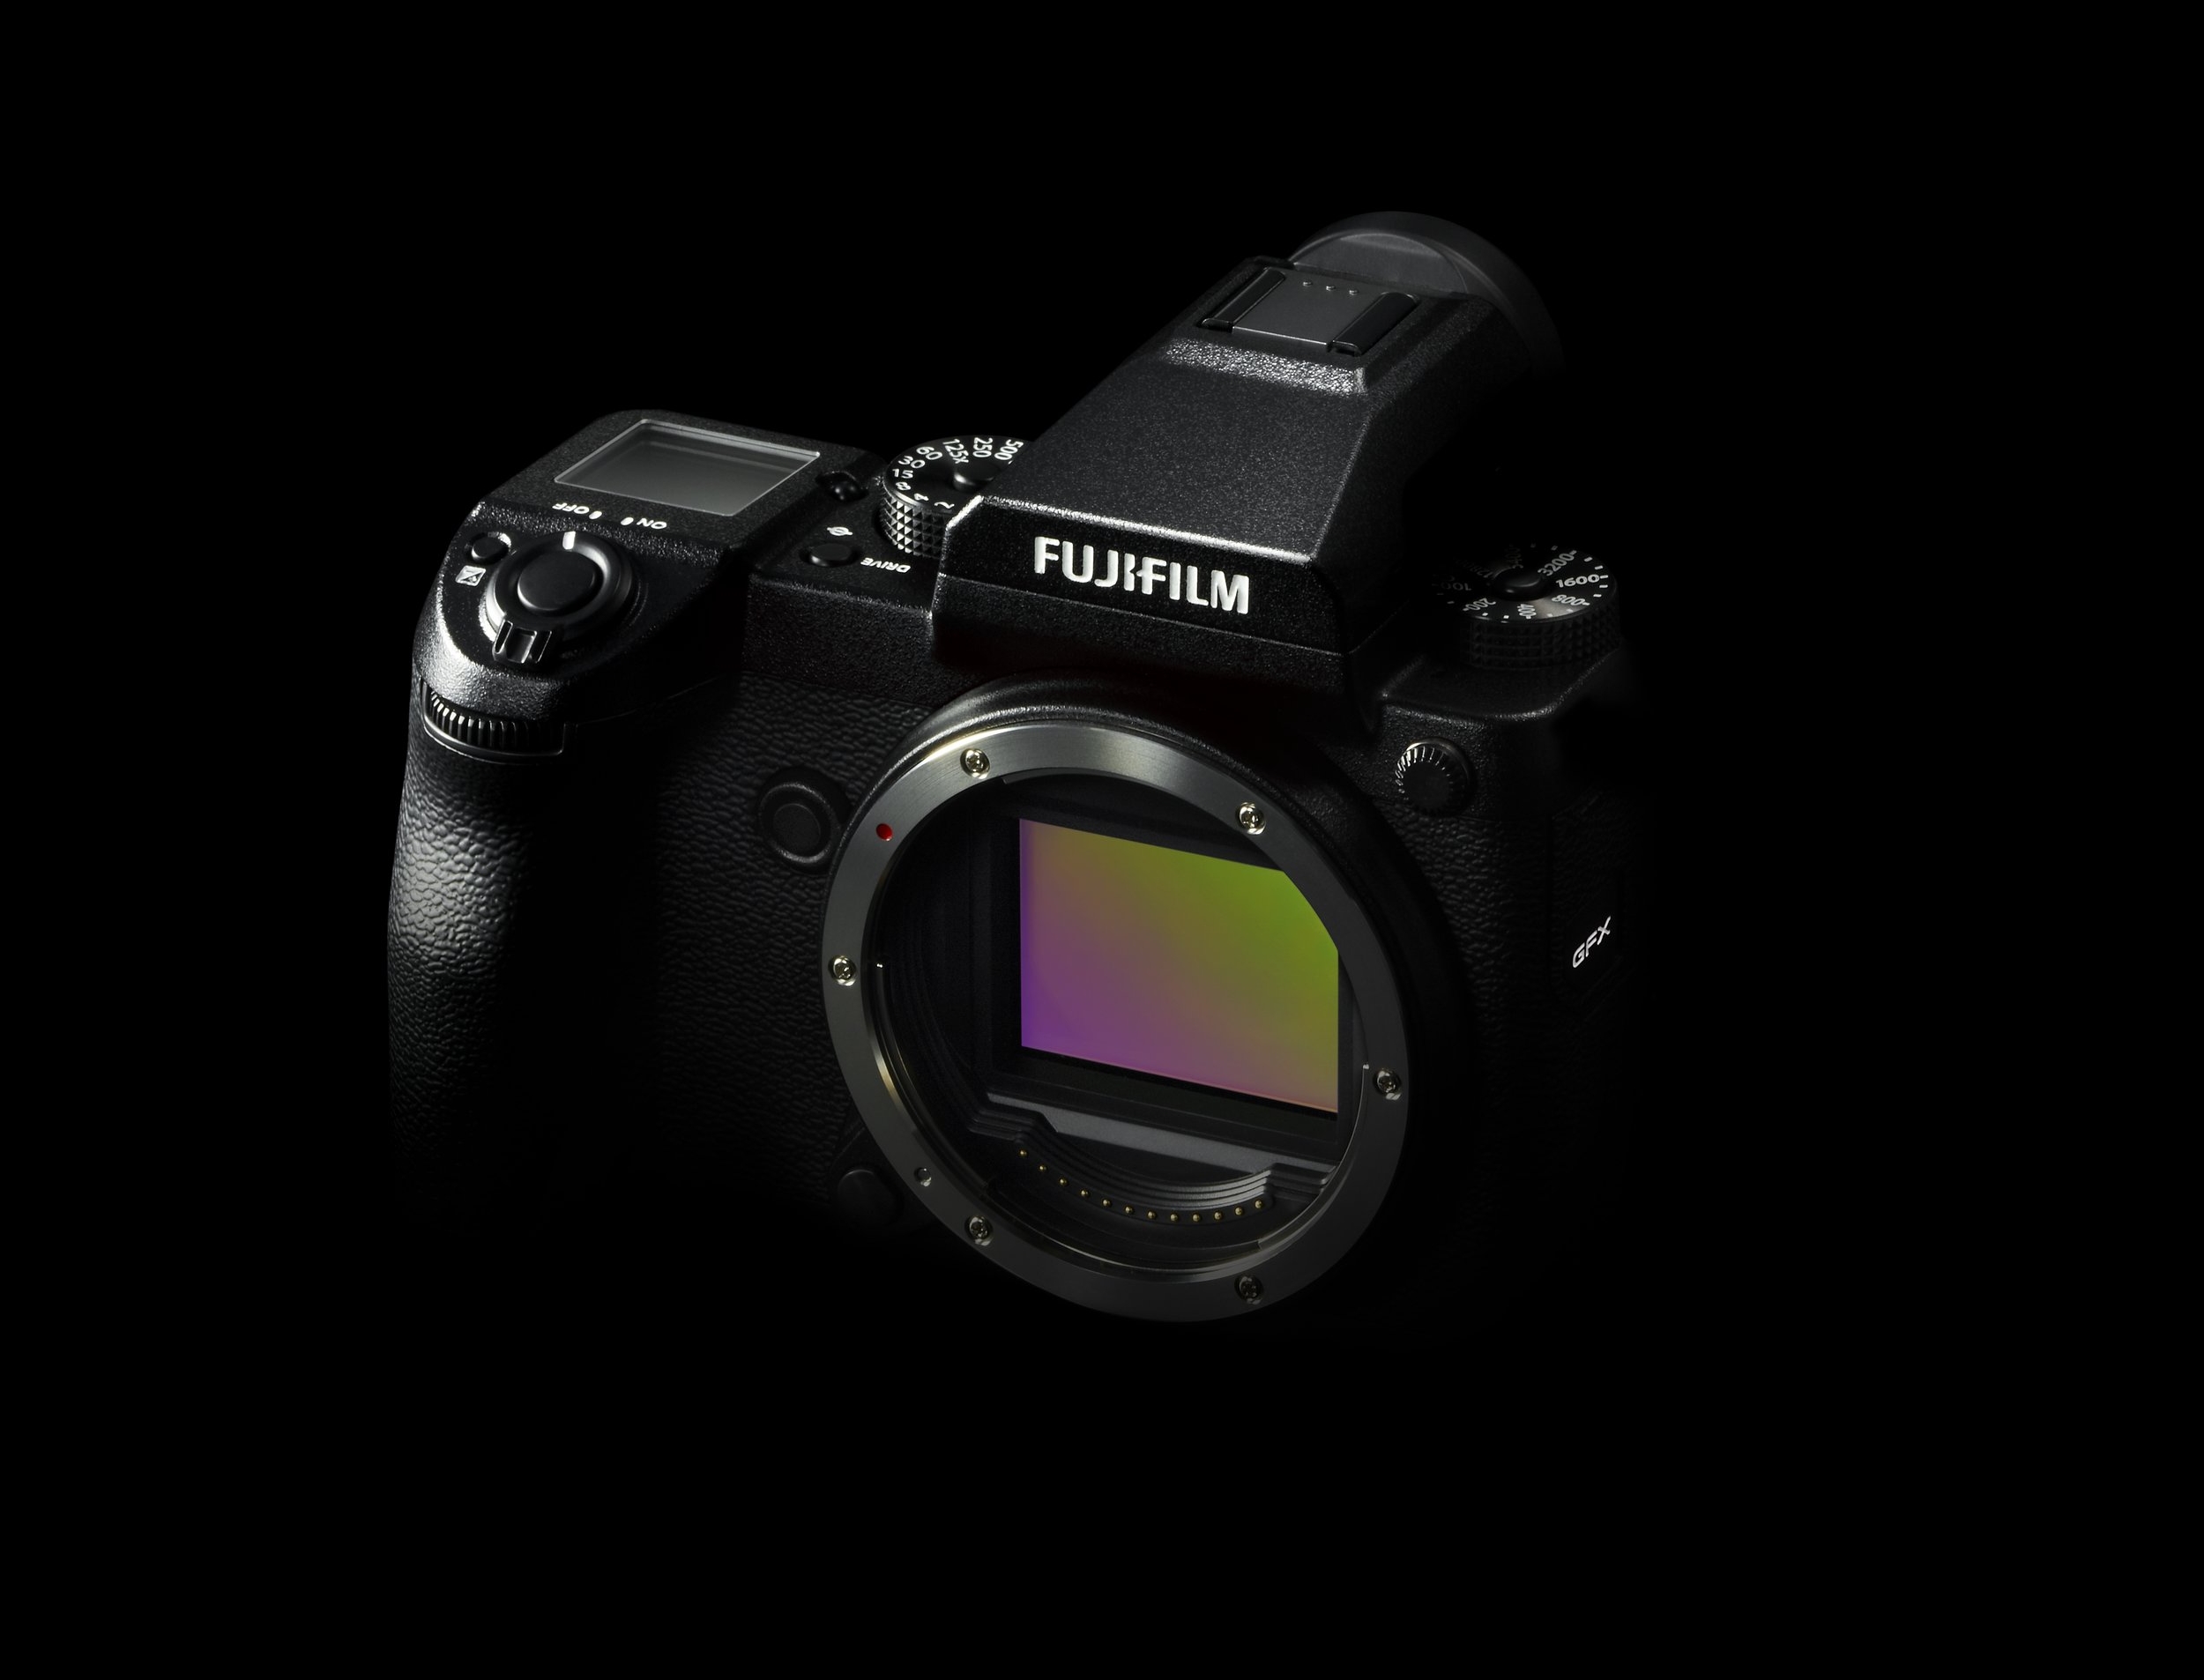
A weekend with the Fujifilm GFX100S and the GF80
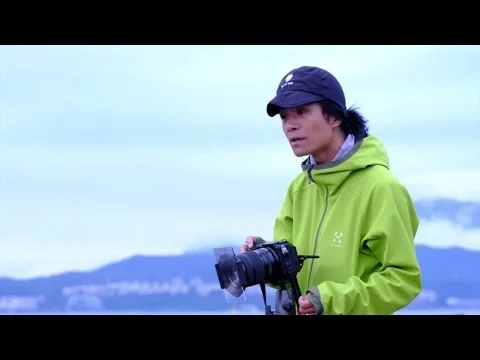
Just before its launch, my fellow Fujfilm Belgium ambassadors Tom Museeuw and Pieter D’Hoop and myself, got our hands on the GFX100S and the GF80 f/1.7 lens. We were followed by a camera crew who documented our endeavours and turned them into three five-minute video impressions. For English subtitles, click on the CC icon in the video player.
If you want to see more of our work, then follow us on Instagram
Sharpen AI: a one trick unicorn
Sharpen AI by Topaz Labs is a plug-in for Lightroom and Photoshop, as well as a standalone application, that focuses (no pun intended) on rescuing blurry images using Artificial Intelligence. Sharpen AI can deal with motion blur, missed focus or more general lens unsharpness.
Sharpen AI does only one thing, but it excels at that. In the webinar, I called it a ‘one trick pony’, but that doesn’t do it justice. The term ‘one trick unicorn’ might be more suitable! Regardless of whether you already use Sharpen AI or are new to it, you’re welcome to have a look at the replay of the webinar I did yesterday. It’s got a couple of spectacular examples and I have also included a comparison with Photoshop’s sharpening tools.
Limited time deal: save 25% and an additional 15% on Sharpen AI!
Until April 12, the plug-in is 25% off (down to USD 59.99 from USD 79.99) and on top of that, if you use code MTW15 upon checkout, you can save yourself another 15%, which brings the price down to USD 51 or about € 45.
Below you can see the recording of yesterday’s webinar. It will be available until the timer above hits zero – that’s also when the 25% discount on Sharpen AI ends!
Click on the bottom-right corner icon (with the four outward pointing arrows) to view the video full-screen (recommended to see the detail). Hover over the red dots in the timeline to view chapter info. Click on them to start playing that specific chapter.
Luminar AI Tips & Tricks

Yesterday, the folks over at Skylum did a marathon livestream about Luminar AI. A number of guests, featuring well-known names like Scott Kelby, each had half hour slots to share some of their favourite Luminar AI tips, tricks and ideas. My slot was a little shorter because I was banging on the wrong virtual door for ten minutes, but if you know me, you know I go through my demos so swiftly that I easily make up for that ;-)
So, if you’re interested, below is my 20 minute section. For those of you that might struggle with my accent – or those of you who are watching this on mute when you’re supposed to be working ;-) – I’ve added Subtitles. Just click on the CC icon in the player. The full stream should be on Skylum’s YouTube channel in one of the coming days.
If you’re interested in purchasing Luminar AI, if you use the link below and enter coupon code MORETHANWORDS during checkout, you’ll get a 10$/€ discount and you’ll also support me to keep creating free content like this. Luminar AI both works as a standalone application as as a Lightroom Classic and Photoshop plug-in. The app also comes with a 30 day money-back guarantee.

4 hours with the Fujifilm GFX100S
Last weekend, Fujifilm Belgium organised a live stream about the newly released GFX100S. Prior to the stream, two of my fellow ambassadors, Pieter D'Hoop and Tom Museeuw, and me were given a GFX100S to play around with for a weekend. While one of us was shooting, the other two acted as assistants, voice activated light stands or sometimes simply as idiots ;-)
Below is a behind the scenes video of my four hours of fame with the GFX100S. It's a hell of a camera and had someone told me less than 5 years ago, when I first laid my hands on a GFX50S, that we'd now have twice the resolution, fast autofocus and IBIS for less than the price of the 50S, I'd declared them nuts. I hope you like the video and if you have any questions about the camera, don't hesitate to comments. I'll try to answer them if I can.
Thanks to Brecht Vercauteren from Becubed for translating our erratic behavious into video so beautifully! And of course also thanks to Riana and Zoë, the two dancers who gave their best, as dancers always do.
This is the gear that I’m using in the video:
Fujifilm GFX100S
Fujinon GF32-64 F/4
Fujinon GF80 F/1.7
Fujinon GF250 F/4
Lovegrove Scatterflash
Godox V1 Fujifilm Speedlight
Godox AD200 Pro
Godox AD600
Godox AK-R1 Accessory set
SMDV Alpha 110 Softbox
SMDV Speedbox 70
SMDV 518 Strip Light
Scotty II portable smoke machine by Smoke Factory
Do you also want to learn to work with flash?
Save 50% on my flash ebook and video training!
My 185 page PDF ebook ‘Light It Up’ will teach you all about it. For a limited time, the ebook is 50% off! You pay only $12.48 instead of $24.95. Available here.

If you prefer to learn through video, then my latest ‘Location Lighting Masterclass’ tutorial video is just what you need. Available here and also currently 50% off! Below you can watch a free chapter!
From light setup to end result in this 3+ hour tutorial filled with lighting, Lightroom and Photoshop tips and techniques. This downloadable course (purchase once, watch as long as you want, where you want, as many times as you want) takes you through a number of different light setups. Watch how I build up a scene one light at a time and and how I finalise the result in Lightroom and Photoshop.
Available now for a short time for only $44.98 instead of $89.95!


110 x 110
Deze pagina in het Nederlands?
Now that the Fujifilm GFX 100S is quickly popularizing ‘small medium format’ cameras, thanks to its incredible value proposition (USD/€ 6.000 for a 100 megapixel beast) and also its much lighter and more compact form factor compared to the original GFX 100, there seem to be a lot of people entering this camera segment. At least, if I am to believe my inbox! A lot of my blog readers apparently have already ordered or even picked up their GFX 100S, according to the emails I'm receiving. Some of these photographers also ask me which lenses I would recommend for the GFX 100S, or any GFX for that matter.
I personally shoot about 80 to 90 percent of my images with just two lenses. I already did a blog post (link here) a while back on one of those two favorites, which is the GF 32-64 f/4, and in my opinion, this is definitely a must have lens. The other lens that I think a new GFX user should get, especially if they're into portraits, is the GF 110 f/2. It’s sharp as a tack, fast and produces beautiful bokeh. For that reason, I decided to create a little slideshow containing 110 of my favorite images that were shot with the GF 110. I hope you'll enjoy it. Thanks for watching. If you already have these two and you’ve got more money to burn, check back later when I’ll post my review of the Irix 45 mm f/1.4 for the GFX (unboxing video here).
Interested in taking a travel photo workshop with me? Sign up for my free newsletter and I’ll keep you posted when our trips to Ethiopia and India will resume. You’ll receive 10 free Lightroom presets to boot!
Most of the images you saw in the video were lit with flash. If you want to know more about using flash on location, check out my Light It Up! ebook or my Location Lighting Masterclass. I work with Godox flashes and SMDV softboxes and highly recommend them for GFX users.
I edit my images in Lightroom using preset and Creative Profiles that I’ve created myself. If you like the look of these images, check out my presets and Creative Profiles below.


Irix 45 mm 1.4 for the Fujifilm GFX Unboxing
This is one of my first ‘unboxing’ videos and it shows! After two minutes I cut my own fingers, after six minutes I got a reprimande – live on Facebook – by Mrs. MoreThanWords that I stole her cutter knife (the very one I cut my fingers with, so from now on I believe in karma), and after seven minutes one of my cameras gave up. But I soldiered on! Anyway, if you are interested in the Fujifilm GFX system, you should definitely not miss this video, because I introduce you to what’s currently the cheapest and fastest lens for the GFX system.


A Lovegrove portrait deconstructed - part 3
This is the third and last part in a series of guest posts by my good friend and lighting wizard Damien Lovegrove, in which he deconstructs a couple of his favourite images. If you find these posts inspiring, then make sure to register for next week’s two-part live online lecture, ‘Lovegrove Portraits Deconstructed, part III & IV’. Until January 21, there’s a 40% early bird discount and you also receive a downloadable recording of both sessions to rewatch at any time you want. So even if the date does not suit you to watch the event live, you’ll still have the recording. Below is what you can expect:

Damien goes Wild (West)

I took this shot using a 250mm telephoto lens at f/4 in the baking hot desert wilderness near Paige in the USA. I lit Yesenia from the right with a Godox AD600 fitted with a 18cm reflector and was happy to find the flash trigger worked at the 100m range. I placed a walkie talkie on the ground behind the rock where Yesenia is standing so I could give direction from the camera position.

I also used a Godox AD600 with a 18cm reflector for this shot of Claire in Monument Valley. In both of these shots I rigged the flash directly opposite the sun and used it on full power. I love how f/4 renders the background beautifully out of focus yet supporting the narrative of this ‘follow me’ shot.
Damien has been using the Fujifilm GFX system for almost all his images from the past years, so if you’re interested in investing in one of the GFX camera’s, you’ll get a great idea of what they’re capable of.
A Lovegrove portrait deconstructed - part 2
This is the second part in a series of three guest posts in which my good friend and lighting wizard Damien Lovegrove deconstructs a number of his favourite images. If you find these blog posts inspiring, then make sure to sign up for next week’s two-part live online lecture, ‘Lovegrove Portraits Deconstructed, part III & IV’ that takes place on January 26 and 28, from 7 to 9 PM GMT. During those sessions, you’ll see and hear a lot more inspiring images and tips like these. Until January 21, you save 40 percent on the joint ticket price and pay only €30 for both sessions. Furthermore, every participant will receive a downloadable recording, so you can watch the sessions again as many times as you like, where you like and when you like! So even if you can’t make it to the live show, it’s still a good idea to book a spot!

The double exposure technique for when you can’t hide your light stand
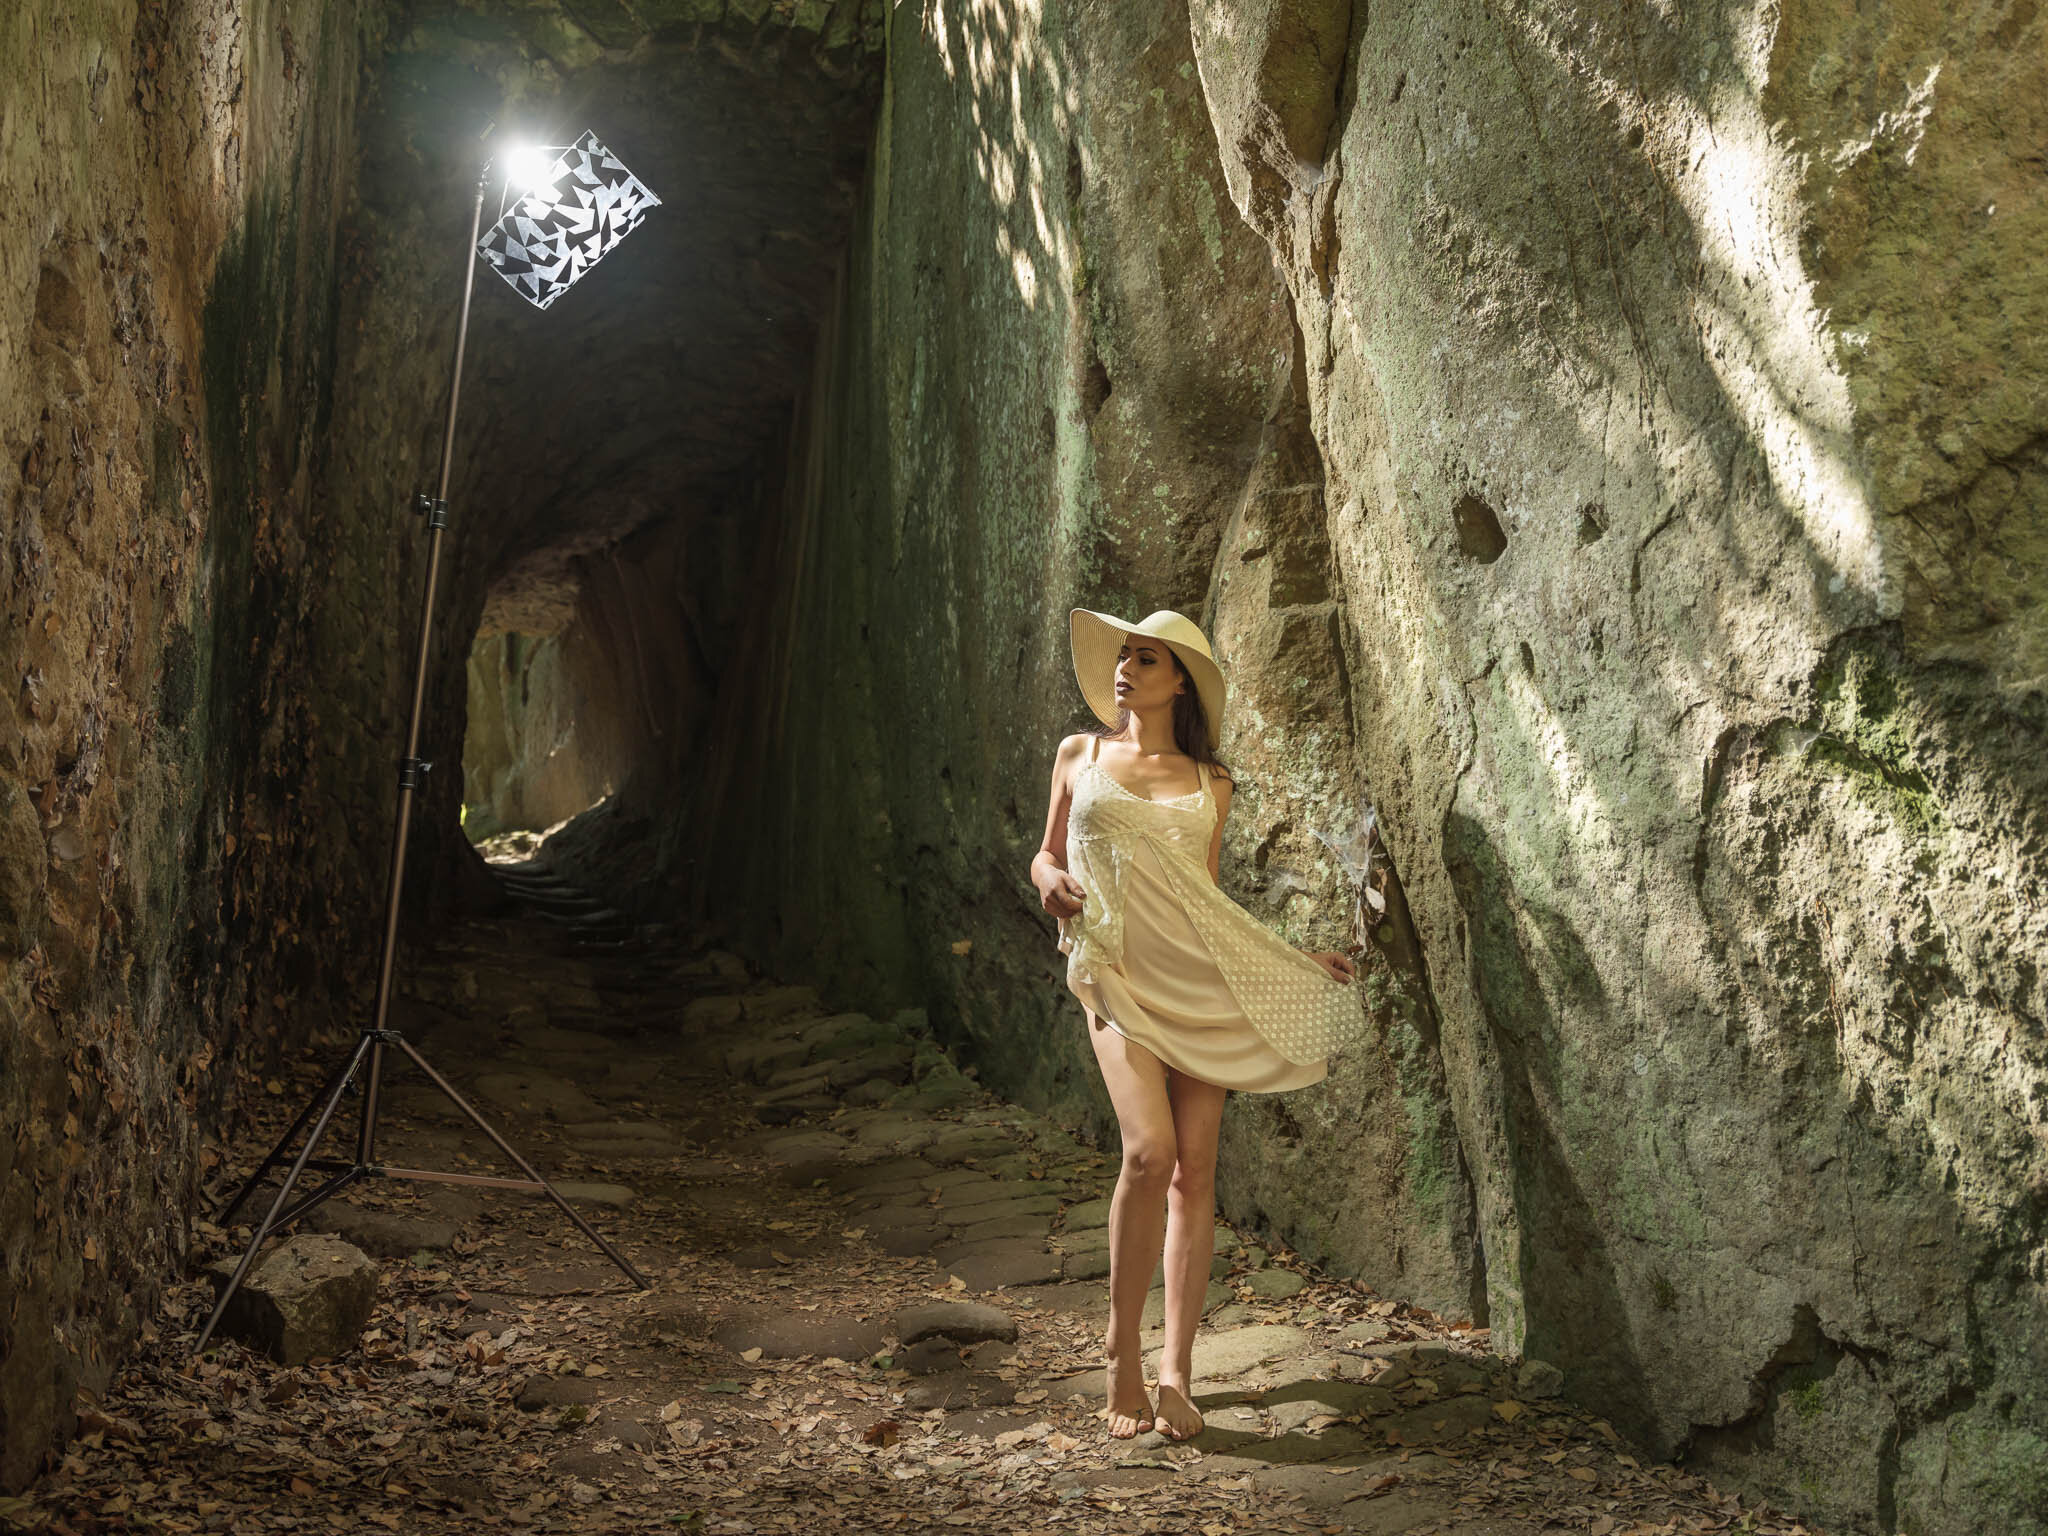

Martina in an interesting location about an hour from Rome. Damien shot this on his 2020 road trip between the lockdowns.
Sometimes I struggle to get the flash where I need it in the shot without it being in the frame, so I use a double exposure technique. I always use a tripod for my camera so this technique is a piece of cake for me. I place the light where it needs to be and capture my moment. Once I have the energy and pose that I need I shoot my master frame. Then without moving the camera, I derive the light and shoot a frame without the flash using the same exposure settings. I then join the two shots in post production. The modifier you see in the shot is the Scatterflash which I also mentioned in the previous blog post.
Urbex with Martina

For this shot of Martina taken at an abandoned sugar factory in Italy also used a double exposure technique. This time though I used the more powerful Godox AD1200 Pro (editor’s note: here you can see Piet using the AD1200 Pro in Brussels) and a 70cm soft box and grid. Once I had the principal shot I took another without the flash and combined them.
You will notice that the sun is coming from a different direction to my flash light and this is quite deliberate. I had no intention of trying to make this shot look realistic. It is a stylised fashionable shot inspired by music album covers of the 1970s.
All these images were shot with a Fujifilm GFX 50S.
A Lovegrove Portrait Deconstructed
This is the first in a series of three guest posts by my good friend and lighting wizard Damien Lovegrove, in which he ‘deconstructs’ a series of his favourite shots. If you’d like to see and hear almost four hours’ worth of composition, posing and lighting tips and techniques like these, then sign up for the two-part inspirational live online lecture ‘Lovegrove Portraits Deconstructed, part III & IV’. Save 40% on your ticket until January 21st.
Working with a central composition
I took this simple shot of Amelia in Switzerland between lockdowns last year. I chose a very central composition when I rigged my tripod. I was unsure about the patch of sunlight on the floor but I really wanted the boarded up window and sloping cobblestones to feature prominently.
I then placed a Godox AD200 high on a stand just out of shot on the right. It was rigged almost touching the wall and was fitted with a Scatterflash attachment. This gave the dappled look that I love so much.
I did a test exposure and settled on ¼ power for the flash and then I invited Amelia to come into the shot. I like to get all the faffing done before I introduce my subject otherwise they get bored.
Shooting 90 degrees to the light
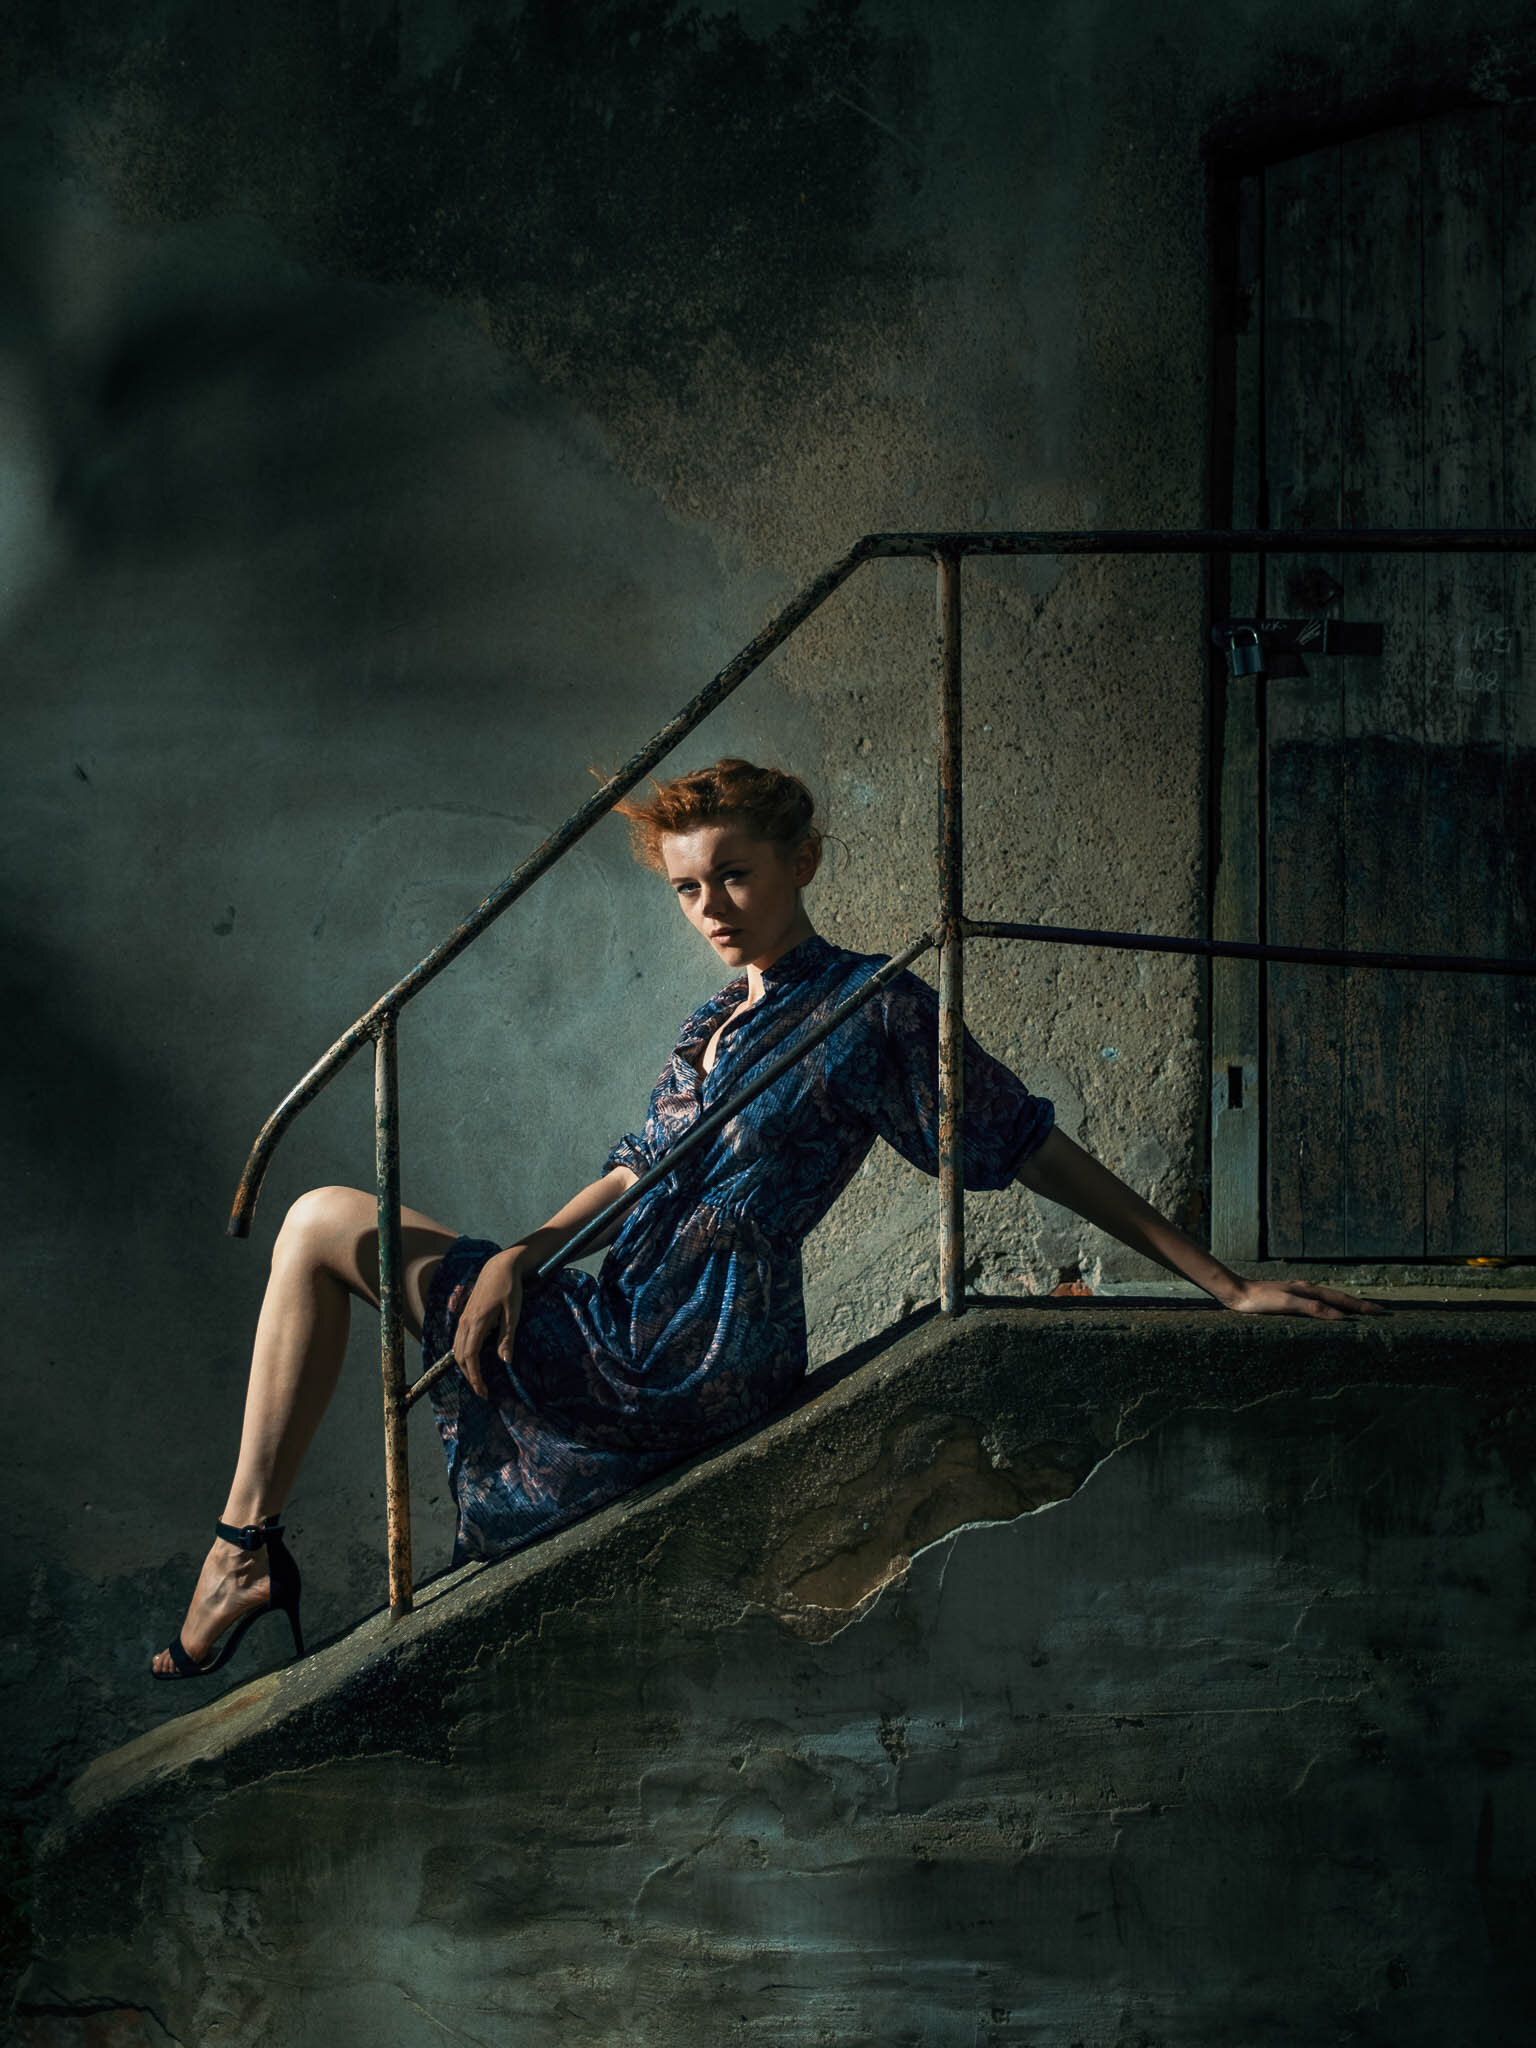
I used the same set up here for this shot of Kate taken in Poland in May 2020. I rigged my Godox AD200 high on a stand at 90° to the camera and scooted the light down the wall. A Scatterflash attachment completed the look.
When I asked Kate to take up her place on the steps I was keen to ensure that I have the ‘Hollywood triangle’ of light on her left cheek.
I gave the finished image a bit of a ‘look’ in Lightroom using a LUT.

In this Set.A.Light 3D setup I simulated the lighting from above. The Scatterflash is not in the tools in Set.A.Light, but I simulated the effect by using a gobo. You can see that the camera and the light are at an angle of ninety degrees to each other and that the model looks about halfway between the two, so that you get the beautiful Rembrandt triangle.
All images shot with a Fujifilm GFX 50S.
3 ways to get dramatic dark skies in your Lightroom Black & White conversions
I just love Black & White conversions with dark, almost pitch-black skies. In this video, I’ll show you three ways you can achieve this effect in Lightroom, without needing a single local adjustment. Have a look!
The best sharpening plug-in I ever used
A while ago, I came across a fantastic plug-in for sharpening images, especially images that suffer from motion blur or unsharpness due to missed focus. The plug-in is called Sharpen AI and it’s by Topaz Labs, whose Gigapixel AI enlargement software I am already using.
Sharpen AI used machine-learning to train its algorithms with pairs of blurred and sharp photos. As such, it can make a more educated guess at how to correct various types of blur.
In the 15 minute video below, I walk you through some examples. If you like the plug-in, you can do me a favour by purchasing it through this affiliate link. And to return the favour, you can use my code MTW15 to take 15% off.
Get Sharpen AI for only $50.99 until August 7th
But it gets even better: to celebrate the launch of the just-released 2.1 update, Topaz has discounted Sharpen AI by 25% until August 7th and my discount is valid on top of that. If you buy now using this link and you enter the discount code MTW15, you end up paying only $50.99 instead of $79.95. Personally, I think that’s a bargain but I’ll let you judge for yourself by watching the video below.

FUJIFILM GFX 100 | GF 23 F/4 | 1/2000 SEC @ F/11 | ISO 400. Post-processing of this photo shoot was done entirely with the Creative Profiles of my new Creative Profiles Pack, Vol. 02.
Godox AD1200 Pro and AD300 Pro Location Shoot

A few weeks ago, I had my first post-Corona shoot. With how things are looking Corona-wise, it may very well have been my last shoot for a while, too. The aim was to test the new Godox AD300 Pro and AD1200 Pro and make a video about it for Disnet, the Benelux importer of Godox and other cool lighting gear such as SMDV. After months of inactivity, I was quite nervous. I had arranged – thanks Bruno! – to meet up near the Brussels Congress Column with Nabil and Shana, two dancers from Brussels. Below you can see the flashes - and the dancers - in action in the behind-the-scenes video that photographer and filmmaker Bruno Maes made. The camera I used was my trusted GFX 100.
AD1200 Pro
What can I say? This thing is a monster! Even after four hours of shooting, the battery was still at two thirds! The fact that you have 1200 Ws at your fingertips gives you an incredible amount of creative freedom. Below you will find the main specifications of this powerhouse.
5 groups & 32 channels
High Speed Sync support up to 1 / 8000th of a second
Optical slave modes
Normal color temperature mode: 5600 K ± 200 K
Stable color temperature mode: 5600 K ± 75 ° K
Powerful 40W LED pilot light
Bowens mount
3,5 meter power cable
Weight: 8.25 kg including flash head, battery and cable
1200 Ws
fan-cooled head
0,01 - 1,9 seconden recycle time
interchangeable 5200 mAh lithium-ion battery. An optional 2600 mAh battery is available if you want to bring the AD1200 Pro along on a plane (the standard battery is too powerful to bring on a plane)
Power manually adjustable from 1:1 to 1:256
TTL / M / Multi
Second curtain sync, front curtain sync
By the way, AD1200 Pro is not the only Godox solution to use 1200 Ws of power on location. Until now, I used two AD600 flashes with the optional H1200B head. In terms of price, you are close to the AD1200 Pro with this combination. The solution with the H1200B head offers the advantage that you are more flexible because you can also use the two flashes separately in a setup with a main light and a kicker light. However, if you often want to shoot at full power, the AD1200 Pro is more convenient to use and moreover it’s a full second faster in terms of recycling time. It’s also more practical to work with one battery pack than with two AD600 flashes that you stuff in a camera bag: with the H1200B and double AD600 combo, it occasionally happened that one of the units in my bag accidentally got into sleep mode (or ran out of power) and that I was actually only working at half power without realizing it.
The AD1200 Pro has a RRP of € 1,699 including VAT. The only alternative known to me is the Elinchrom ELB 1200, but it costs about double that including flash head.
But you shouldn't buy the AD1200 Pro just for its maximum power. Recycle time and battery life can also be an important factor. The full power recycle time is just under two seconds, but that obviously decreases the less power you need, while the battery lasts longer. The AD1200 Pro comes with a roller case that is very similar in concept to the ThinkTank Airport TakeOff: it can be converted into a backpack if necessary via the two carrying straps hidden in the back panel. With some rearranging, there is even room in the trolley for an AD300 Pro, which immediately brings me to the next flash I used on this shoot.
AD300 Pro
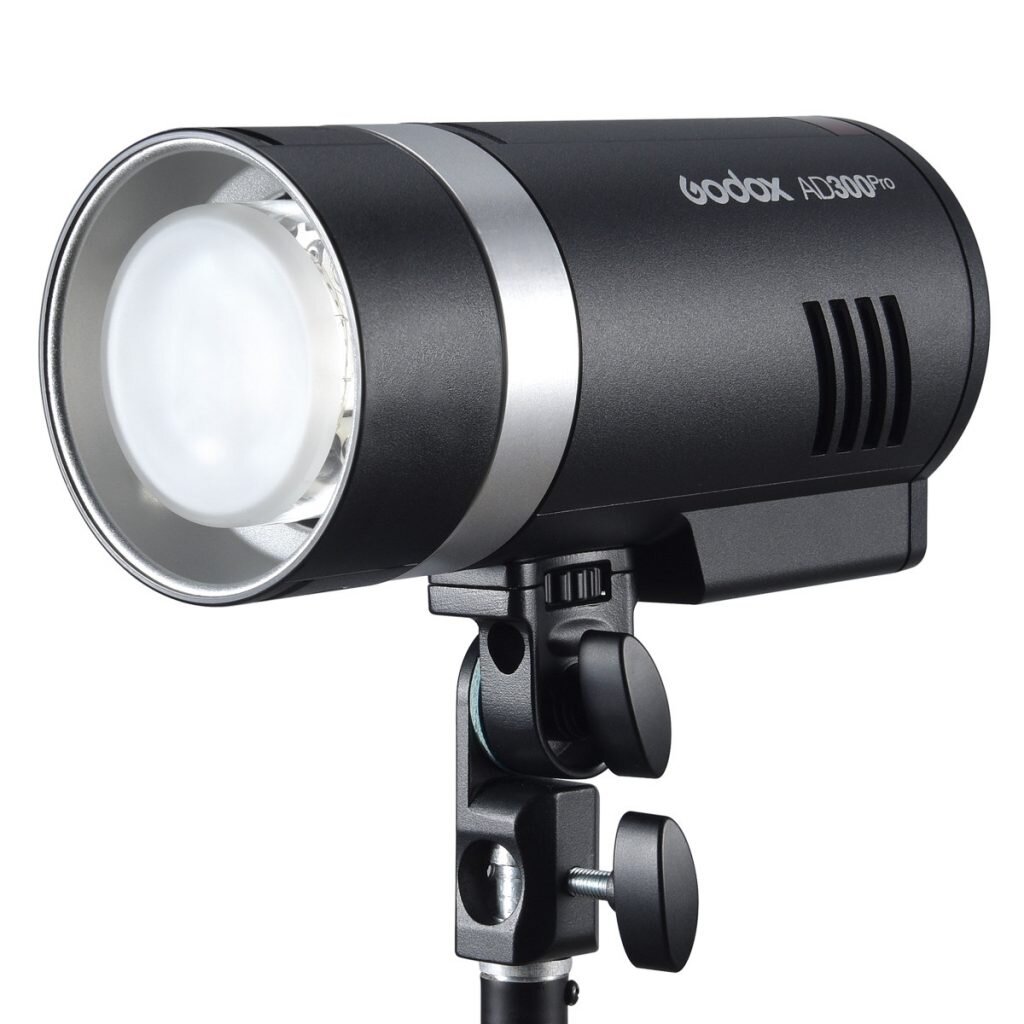
As the new top-of-the-bill in the Godox range, the AD1200 Pro is of course somewhat more of a niche product. Although… It apparently sells so well that it is sold out at most Belgian and Dutch retailers. The AD300 Pro on the other hand has everything to become a real best-seller. It is very compact because it comes standard with Godox's own mount and not with the more popular but larger Bowens mount. However, with the new S2 adapter you can easily make it Bowens-compatible. If you’re looking for a more permanent solution, then there is also an adapter that you screw onto the AD300 Pro. This adapter exists in a Bowens, Profoto, Elinchrom and Broncolor version. Handy if you already have numerous light modifiers for one of those brands.
Because of its compact shape, the AD300 Pro is easy to stow away in a camera bag. The battery allows for more than 300 full power flashes and you can even use AD200 & AD200 Pro batteries in it. The AD300 Pro is not only suitable for portrait photography, I recently used it to take real estate photos. I used to use hotshoe flashes like the V860 II for that, but at almost four times the power, the AD300 Pro lets me work faster, and also makes it easier to use bounce and indirect flash to evenly illuminate a large space. Also handy is the LED pilot light whose color temperature is adjustable between 3000 and 6000 Kelvin.
The ideal travel flash?
Thanks to its compact shape, the AD300 Pro seems to be the ideal travel flash when you want a bit more power than a standard hotshoe flash. In combination with an S65 or S85 Godox Softbox that use the compact Godox Mount, you have a compact mini-studio for a total weight of about two kilos. Personally, I still prefer the twice as powerful, but also much larger and heavier AD600 when traveling. That's partly because I like using even bigger softboxes - and the larger the softbox, the more powerful your light needs to be. However, it is mainly because I teach at travel workshops and I need the extra battery capacity of the AD600 for my students. Also, I normally work with Fujifilm's GFX camera line. These have a sync speed of only 1/125th compared to the 1/250th of most other cameras (for example, the X-T4).
The sync speed has an impact on how powerful your flash must be to make a certain photo. For example, with my X-T4, I can work at 1/250th, ISO 100, f/8. To get the same background exposure, I have to work with my GFX on 1/125th and use f/11. However, that aperture only lets in half the amount of flash light compared to f/8. So I have to use a twice as powerful flash to take the same picture with the GFX as with the X-T4. The slower sync speed is basically costing me a stop of flash power that I need to compensate for by using a more powerful flash. Using HSS is possible, but involves a loss of efficiency, so it is not a solution from an efficiency standpoint.
The 'sync speed problem' arises especially when photographing with flash during the day, in full sun, but that's exactly the time of day I want to use flash, to balance the sun. Moral of the story: with an AD300 Pro and a camera with a 'normal' synchro speed of 1/250th second, you can do quite a lot.
I think Godox have a real winner on their hands with the AD300 Pro.
Normal color temperature range: 5600 K ± 200 K
Stable color temperature mode: 5600 K ± 100 ° K
Bi-color LED pilot light (3000 K - 6000 K)
Godox mount. Optional Bowens, Profoto, Elinchrom & Broncolor adapters available
USB Type C port for firmware upgrades
3,5 mm sync port for manual sync
Dimensions: 19 x 9,8 x 8,7cm
Weight: 1,4 kg including battery
300 Ws
0,01 - 1,5 second recycle time
interchangeable 14,4 V / 2600 mAh lithium-ion battery. The AD300 Pro also can use AD200 and AD200 Pro batteries.
Manual power range from full power to 1:256
TTL / M / Multi
Rear curtain sync & front curtain sync
5 groups & 32 channels
High Speed Sync support up to 1 / 8000th of a second
Optical slave mode
Compatibility
As I have been saying for a few years now, the reason why I use Godox is not only their good value for money but especially because Godox offers a complete eco-system where all flashes, from the tiny TT350 to the 30 times heavier (literally and figuratively) ) AD1200 Pro are mutually compatible and work seamlessly and wirelessly. Moreover, Godox has the widest camera compatibility in the market: there are transmitters for Nikon, Canon, Fujifilm, Olympus / Panasonic, Sony and even Pentax! Only Leica users don’t have a dedicated trigger but if they swear by the available light anyway :-)
Resources:
If you want to get better at off-camera flash, have a look at my PDF ebook Pushing Light: at 200 pages, it teaches you all you need to know to work with flash on location. The deluxe edition comes with three bonus videos and 5 bonus Lightroom presets and is available here for only USD 34.95
The color grading of the images in the video was done with my latest Creative Profiles pack for Lightroom Classic, ACR & Photoshop. It’s available here.

Face Light in Lightroom
One of my favorite features in Luminar is the Face Light tool, with which you can automatically brighten faces in a photo. In the video below I try to put together something similar in Lightroom Classic, without the Artificial Intelligence part, though!
If you prefer Luminar after all, don’t forget that you can score a 10€/USD discount by using this affiliate link and entering coupon code MORETHANWORDS upon checkout.

How to apply blockbuster movie looks to your still images in Photoshop, Luminar and Lightroom
Apply the look of Hollywood blockbusters to your own images!
In my blog post of a couple of days ago, I focused on the tutorials that were included in the 5DayDeal Video Creators Bundle. I gave you an overview of what is included in terms of training material to learn to film with your camera and also to learn to edit video with apps such as Adobe Premiere Pro, DaVinci Resolve or Final Cut Pro X.
But ... there are many other goodies in the bundle, including many LUTs. LUTs or LookUp Tables are like the presets of the video industry. They are small text files in a specific file format (such as .CUBE or .LUT or .LOOK) that indicate how a video editing app should adjust the color, contrast and exposure of a movie or video file. These LUTs are often inspired by the color palette of television series and blockbusters. LUTs are a super important part of giving a movie or series its own "look".
But… did you know that you can also use those LUTs included in the 5DayDeal Video Creators Bundle in your photo editing? Whether you use Lightroom, Photoshop or Luminar! I show you the secret on how to get a touch of Hollywood in your images in this video!
Interested? The 'Main Bundle' edition of the 5DayDeal Video Creators Bundle (US$ 89) contains no less than 35 ready-made LUTS that you can import and use in Lightroom Classic the way I showed you in the video. In addition, the package contains more than 60 LUTs that you can use in Luminar or in Photoshop with the LUT adjustment layer technique and of which you can convert your favorites to a Creative Profile for Lightroom with the technique that I demonstrated in the video. So almost 100 LUTs together for US$ 89! Not to mention the royalty free music files, which can come in handy when creating a slideshow in Lightroom!
(*) The Call-Of-Duty LUT I demo in the video can be found in the Pro bundle of the 5DayDeal, along with 60 more LUTs. The Pro Bundle costs an additional US$ 39.


Drag the slider to the right to view this straight-out-of-camera photo with a LUT inspired by the movie "Once Upon a Time In Hollywood".
P.S. There are three variants of the bundle in total: the Main Bundle (US$ 89), the Pro Bundle (US$ 128), and the Complete Bundle (US$ 157). The courses I have discussed in my previous blog post are all part of the cheapest Main Bundle. If you want even more training content and other goodies such as royalty-free music or extra LUTs, the other two bundles will give you extra value for your money.
Luminar 4 for only €59
Until June 17 you can purchase Luminar 4 from Skylum for only €69 instead of €89. Upon checkout, you can get an extra €10 discount by clicking on ‘Enter Promotional Code’ in your cart and entering the code MORETHANWORDS, so that you ultimately only pay €59. If you’re in Europe and you’re VAT-registered, you can enter your VAT number in the ‘Enter VAT ID’ link and you’ll even be exempted from VAT.
€59 is a real bargain for this great software! If you like to photograph landscapes, you will certainly be interested in the AI Sky Enhancer and the AI Sky Replacement tools: the first automatically improves an existing sky, the second puts a new one in an instant.

Replace a boring sky with a new one? In Photoshop, you can easily spend an hour. In Luminar, you do it in fifteen seconds!
If you prefer portrait photography, then the Luminar 4 portrait retouch features alone are probably worth the price of admission it. Softening skin, brightening bags under people’s eyes, accentuating eyes, …Luminar 4 does it all super fast and credibly.
Moreover, you can use the application both as a Lightroom and Photoshop plug-in and as a standalone product.
Still in doubt? Then check out the English webinar that I did some time ago on Luminar 4. But I warn you: only look if you still have €59 in your wallet, because you will undoubtedly want to buy the software afterwards!
The 5DayDeal Video Bundle
As with many other photographers, the Corona crisis has put a dent in my earnings from live workshops, demos and lectures as all of those were canceled overnight. On the other hand, that also meant that I suddenly had a lot of extra time. Part of that time went into teaching the tables of multiplication to my six-year-old Noah, but I also committed myself to learning some new skills. In my case, that was video editing. After all, there’s no escaping it. As a professional photographer, you are increasingly being asked whether you can also supply video, and as an amateur photographer it would be a shame not to at least try some of the video functions of your precious mirrorless or DSLR camera.
But… you may have the gear, but not the knowledge how to use it yet. And that's where the 5DayDeal Video Bundle can help. This bundle is exactly the same concept and quality as the annual 5DayDeal October Photo bundle with the major difference that it is entirely focused on… video.
Until June 16, noon PDT, enjoy over 95% off on a bundle of video training and other useful things like royalty-free music, LUTs to make your videos look more cinematic and much more!
In today's blog post I’ll focus on the training included in the bundle. In a future blog post I will return to the other goodies, and how they can be interesting even for photographers!

Courses about filming:
The bundle includes two super interesting video courses about filming with your (mirrorless or DSLR) camera: an introduction course from the world famous Fstoppers, which normally costs $140 alone. Last Black Friday, I got it on sale year for $70. Now it is included in the bundle! I have already watched the course and it is a very solid introduction to filming for photographers.
This course normally retails for $140, now it’s included with all the other great resources in the 5DayDeal Video Bundle for only $89.
A second, more advanced course is ‘Seamless Video Pro’. This is a seven hour+ course that deals with how to make professional transitions (both while filming as during editing), working with color grades and more. If you’re professionally involved with video, or you want to be, then this course will give you loads of inspiration!
This course normally retails for $99, now it’s included with all the other great resources in the 5DayDeal Video Bundle voor slechts $89.

Tutorials about video editing:
There are three major players in the video editing software business: Adobe Première Pro (which you may already have as part of your Creative Cloud subscription), DaVinci Resolve and Final Cut Pro X. The latter only works on Mac. They all look a bit alike, but the good news is that this bundle includes at least one tutorial for each package:
Video-editing with DaVinci Resolve (normally $80, now included in the bundle)
Quickstart Guide for Première Pro (normally $97, now included in the bundle)
Final Cut Pro X Masterclass (normally $299, now included in the bundle)

The Final Cut Pro Masterclass is very complete, with amongst others chapter on multicam editing.
So if you want to start with video, but you do not know yet which package might be the best fit, you could watch a couple of excerpts from each of these three courses and then you will quickly get a feel for which application suits you best in terms of interface and possibilities. For example, I myself opted for Final Cut Pro X.
Do you have acting or directing aspirations? Even that’s covered!
In addition to filming and editing, there is of course also acting and directing. These aspects of the film industry are also covered in the 5DayDeal Video Bundle:
Screenwriting and Story Development (normally $200, now included in the bundle)
Acting Cinema Course (normally $99, now included in the bundle)
The total of all these courses alone comes to $1111. In the 5DayDeal Video Bundle you buy them for less than one tenth of that price. Do you want to start with video or improve your existing video skills? Then this bundle is just a no-brainer!
P.S.There are acturally three variants of the bundle: the Main Bundle ($89), the Pro Bundle ($128), and the Complete Bundle ($157). Or as they say on the 5DayDeal itself: Good, Better, Best. The courses I have discussed on this page are all part of the $89 Main Bundle. If you want more training content and other goodies such as more royalty-free music, the other two bundles will give you even more extra value for your money.

Compagnon Explorer+ out in the field in the Omo Valley, Ethiopia.
Compagnon Explorer+ Photo Backpack Review
Compagnon Bags are what you could call a ‘boutique bag’ maker. I came across them a couple of years ago at Photokina. I was looking for a bag that I could put my Fujifilm GFX, lenses and accessories in. Compagnon’s then-released Weekender Bag looked like the perfect deal. Normally, Compagnon bags use lots of natural materials like waxed canvas and leather. It makes their bags look more like regular bags instead of photo bags.

Compagnon’s Weekender Bag is the perfect home-away-from-home for my GFX kit.
Now, as lovely as these natural materials are, they are also a bit heavier and sometimes, you just want to keep the weight down. Especially in backpacks. A while ago, Compagnon launched a Kickstarter project in collaboration with Deuter, a big name in the backpacking world. I have been using regular Deuter travel backpacks for years. The result of that project was the Explorer and the Explorer+. Deuter brought their knowhow about carrying comfort to the table and Compagnon added their knowledge about what photographers need in a bag.
Compagnon Explorer+
Curious to see what that love-child would look like, I contacted Compagnon if I could put their bag to the test and they kindly send me a unit. Up until recently, I have been using an F-Stop Loka UL. That is still a backpack I highly recommend if you want a really lightweight backpack, but since I’ve been using the Fujifilm GFX system, the Loka UL is a bit too small – it especially lacks depth – and the padding of the straps is not soft enough to carry a heavy load for any prolonged period of time.

The Explorer+ somewhat disrespectfully used as a sandbag to weigh down my light stand…

… and the resulting portrait :-)
I’ve been using the Explorer+ on my last two trips to Ethopia and Kolkata and I really love the bag! At 2.2 kilograms, it’s still relatively light, especially given its volume of approximately 25 liters (+ 12 liters in the rolltop) and its carrying comfort. And what I like best is that it’s fairly deep, so it has no problem with big camera bodies like the GFX 100. It can even hold a Godox AD600 Pro flash! With airlines checking your carry-on weight more and more, the actual weight of the bag is becoming increasingly important. It’s the reason I stopped using roller bags when flying because those bags will often weigh five kilograms… empty. Put in a camera and a lens and you’re technically already overweight :-) A backpack also has the advantage that, once arrived at your travel destination, you can continue to use it on the streets.

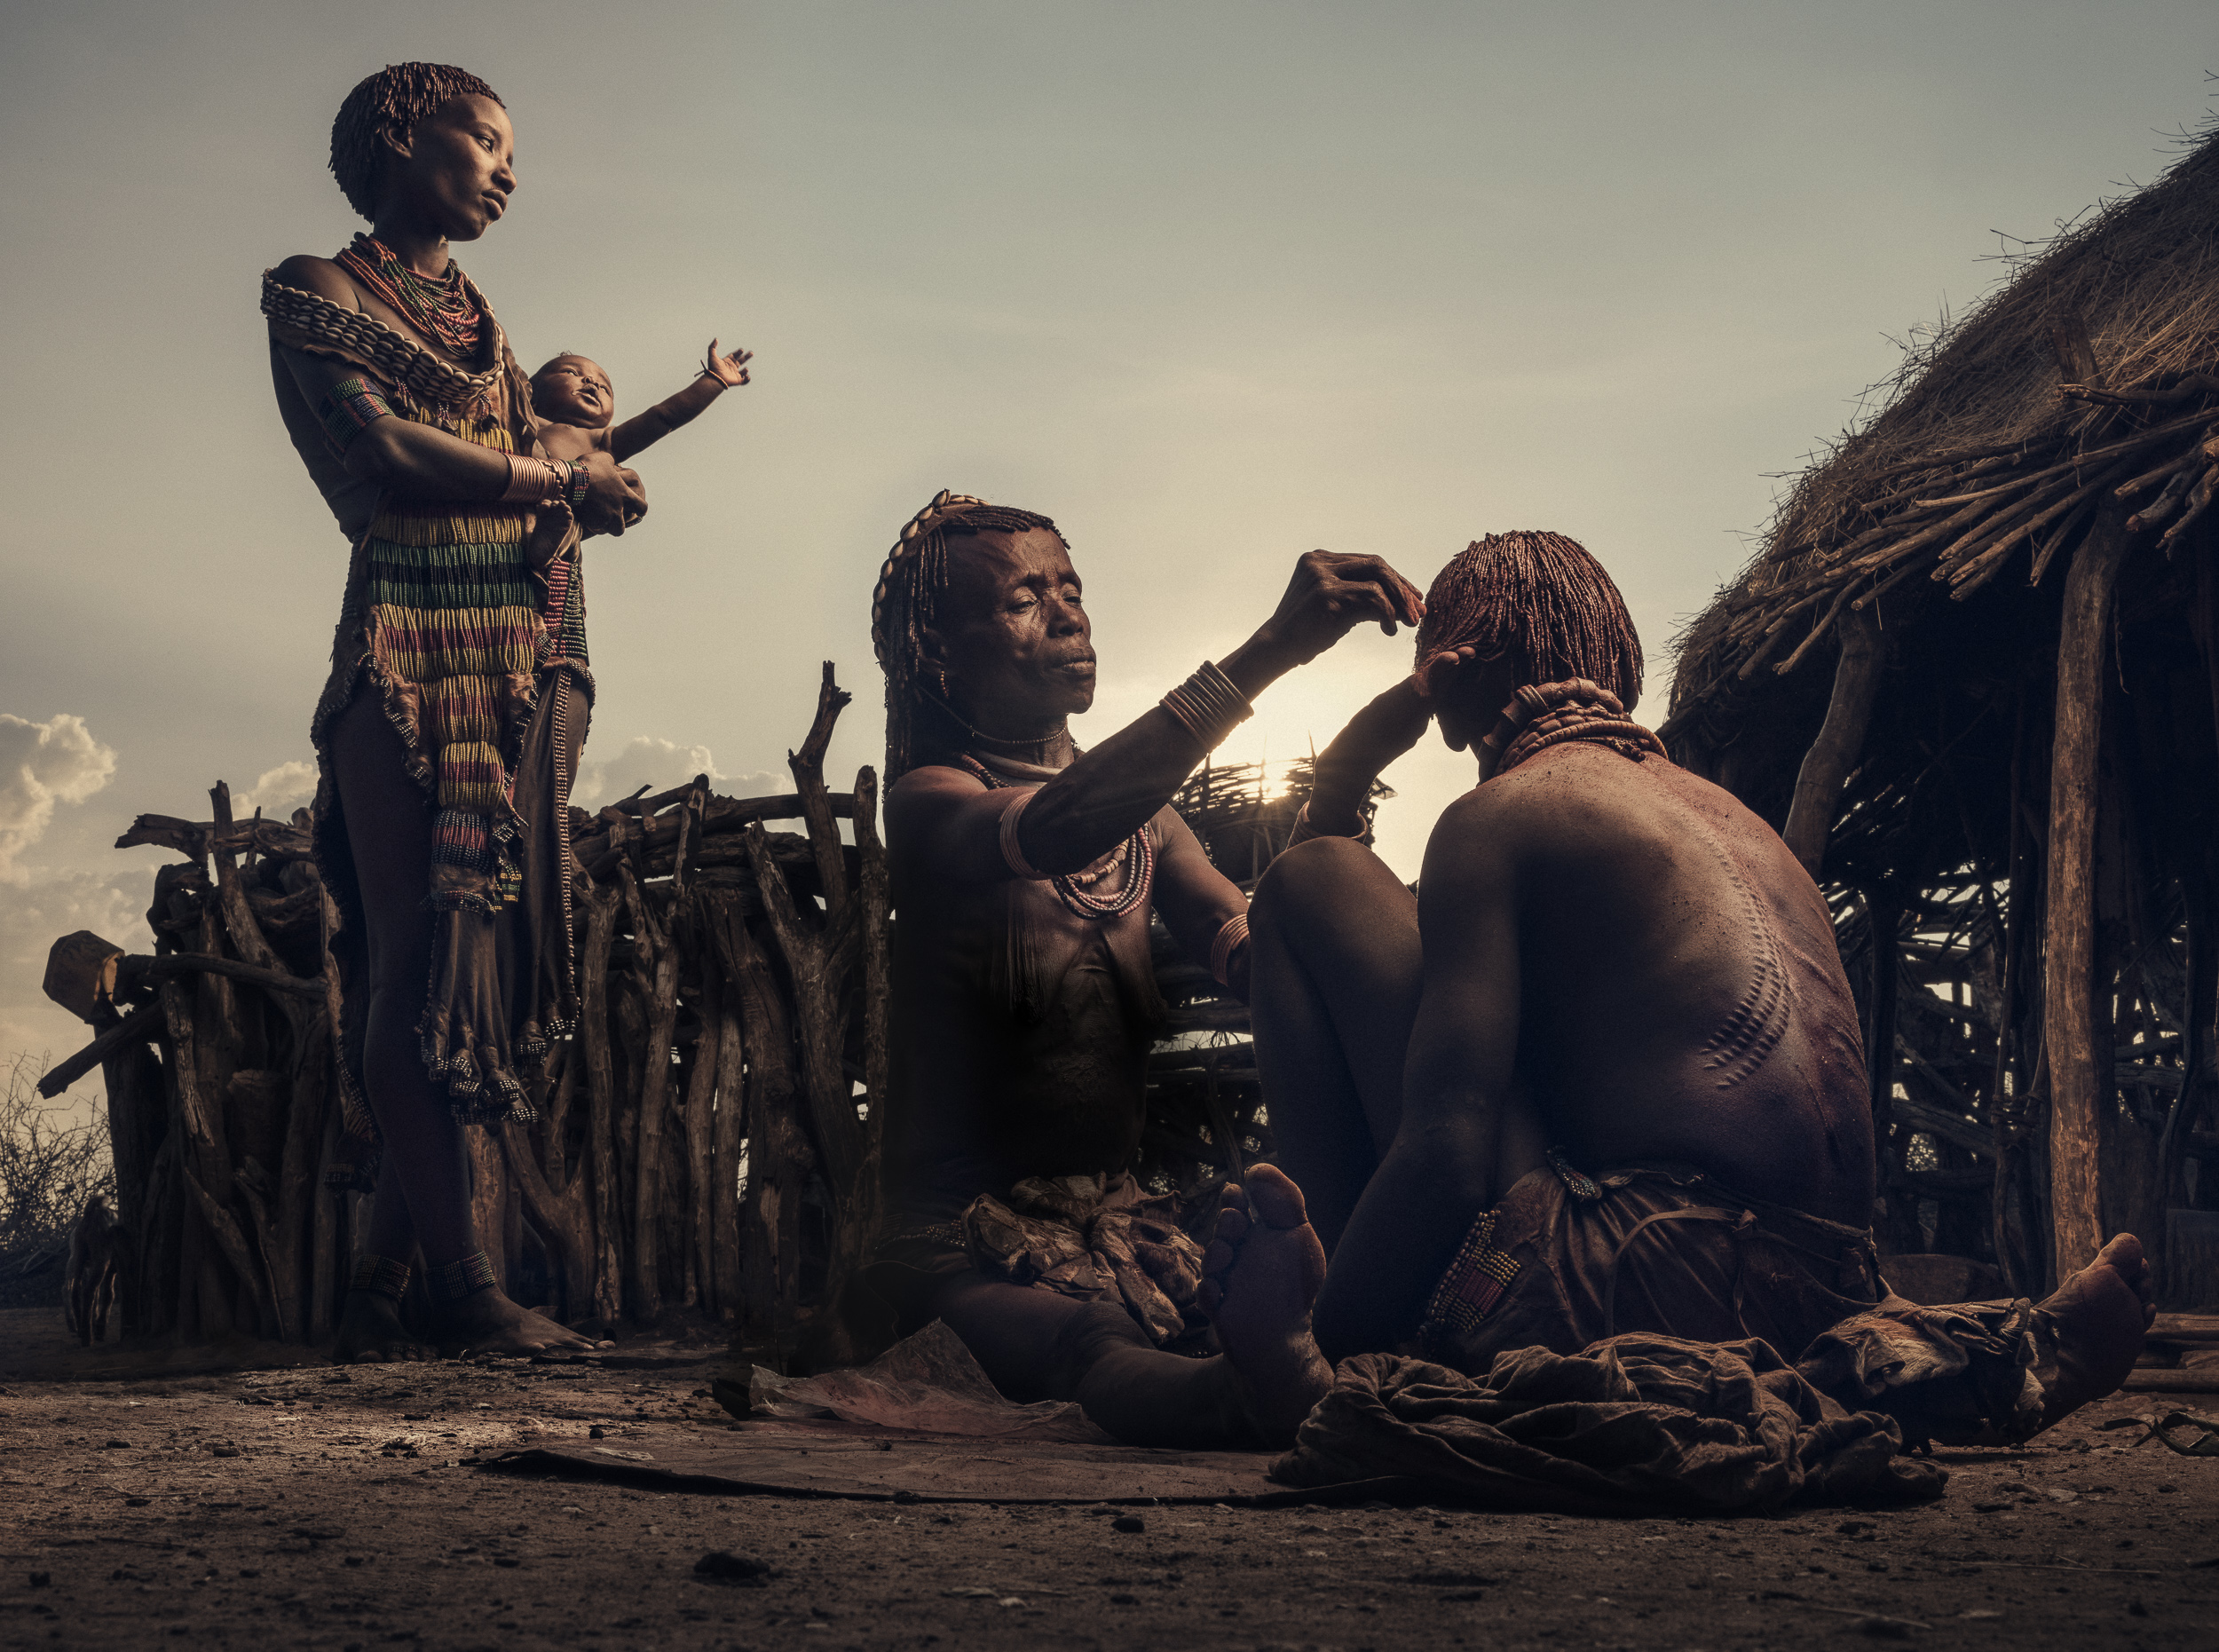
Ethiopia, Omo Valley. Portrait of a young Hamar girl carrying water. Fujifilm GFX 100, Godox AD600, SMDV Alpha 110 Softbox, Godox AD400 Pro, SMDV Speedbox 70.
Have a look inside my portable flash photography studio!
In the video below, I show you how I set up the Explorer+ backpack as a portable flash photography studio and I walk you through why I like it and I also show you how a small modification can make it even better!
The full specs of the bag can be found on Compagnon’s website, so I won’t be repeating them here. I’m looking forward to exploring other parts of the world with the Explorer+ and I’m also going back to Ethiopia with it later this year. If you feel like joining me, check out this page!

Ethiopia, Mursi girl. Fujifilm GFX 100, Godox AD600, SMDV Alpha 110 Softbox.

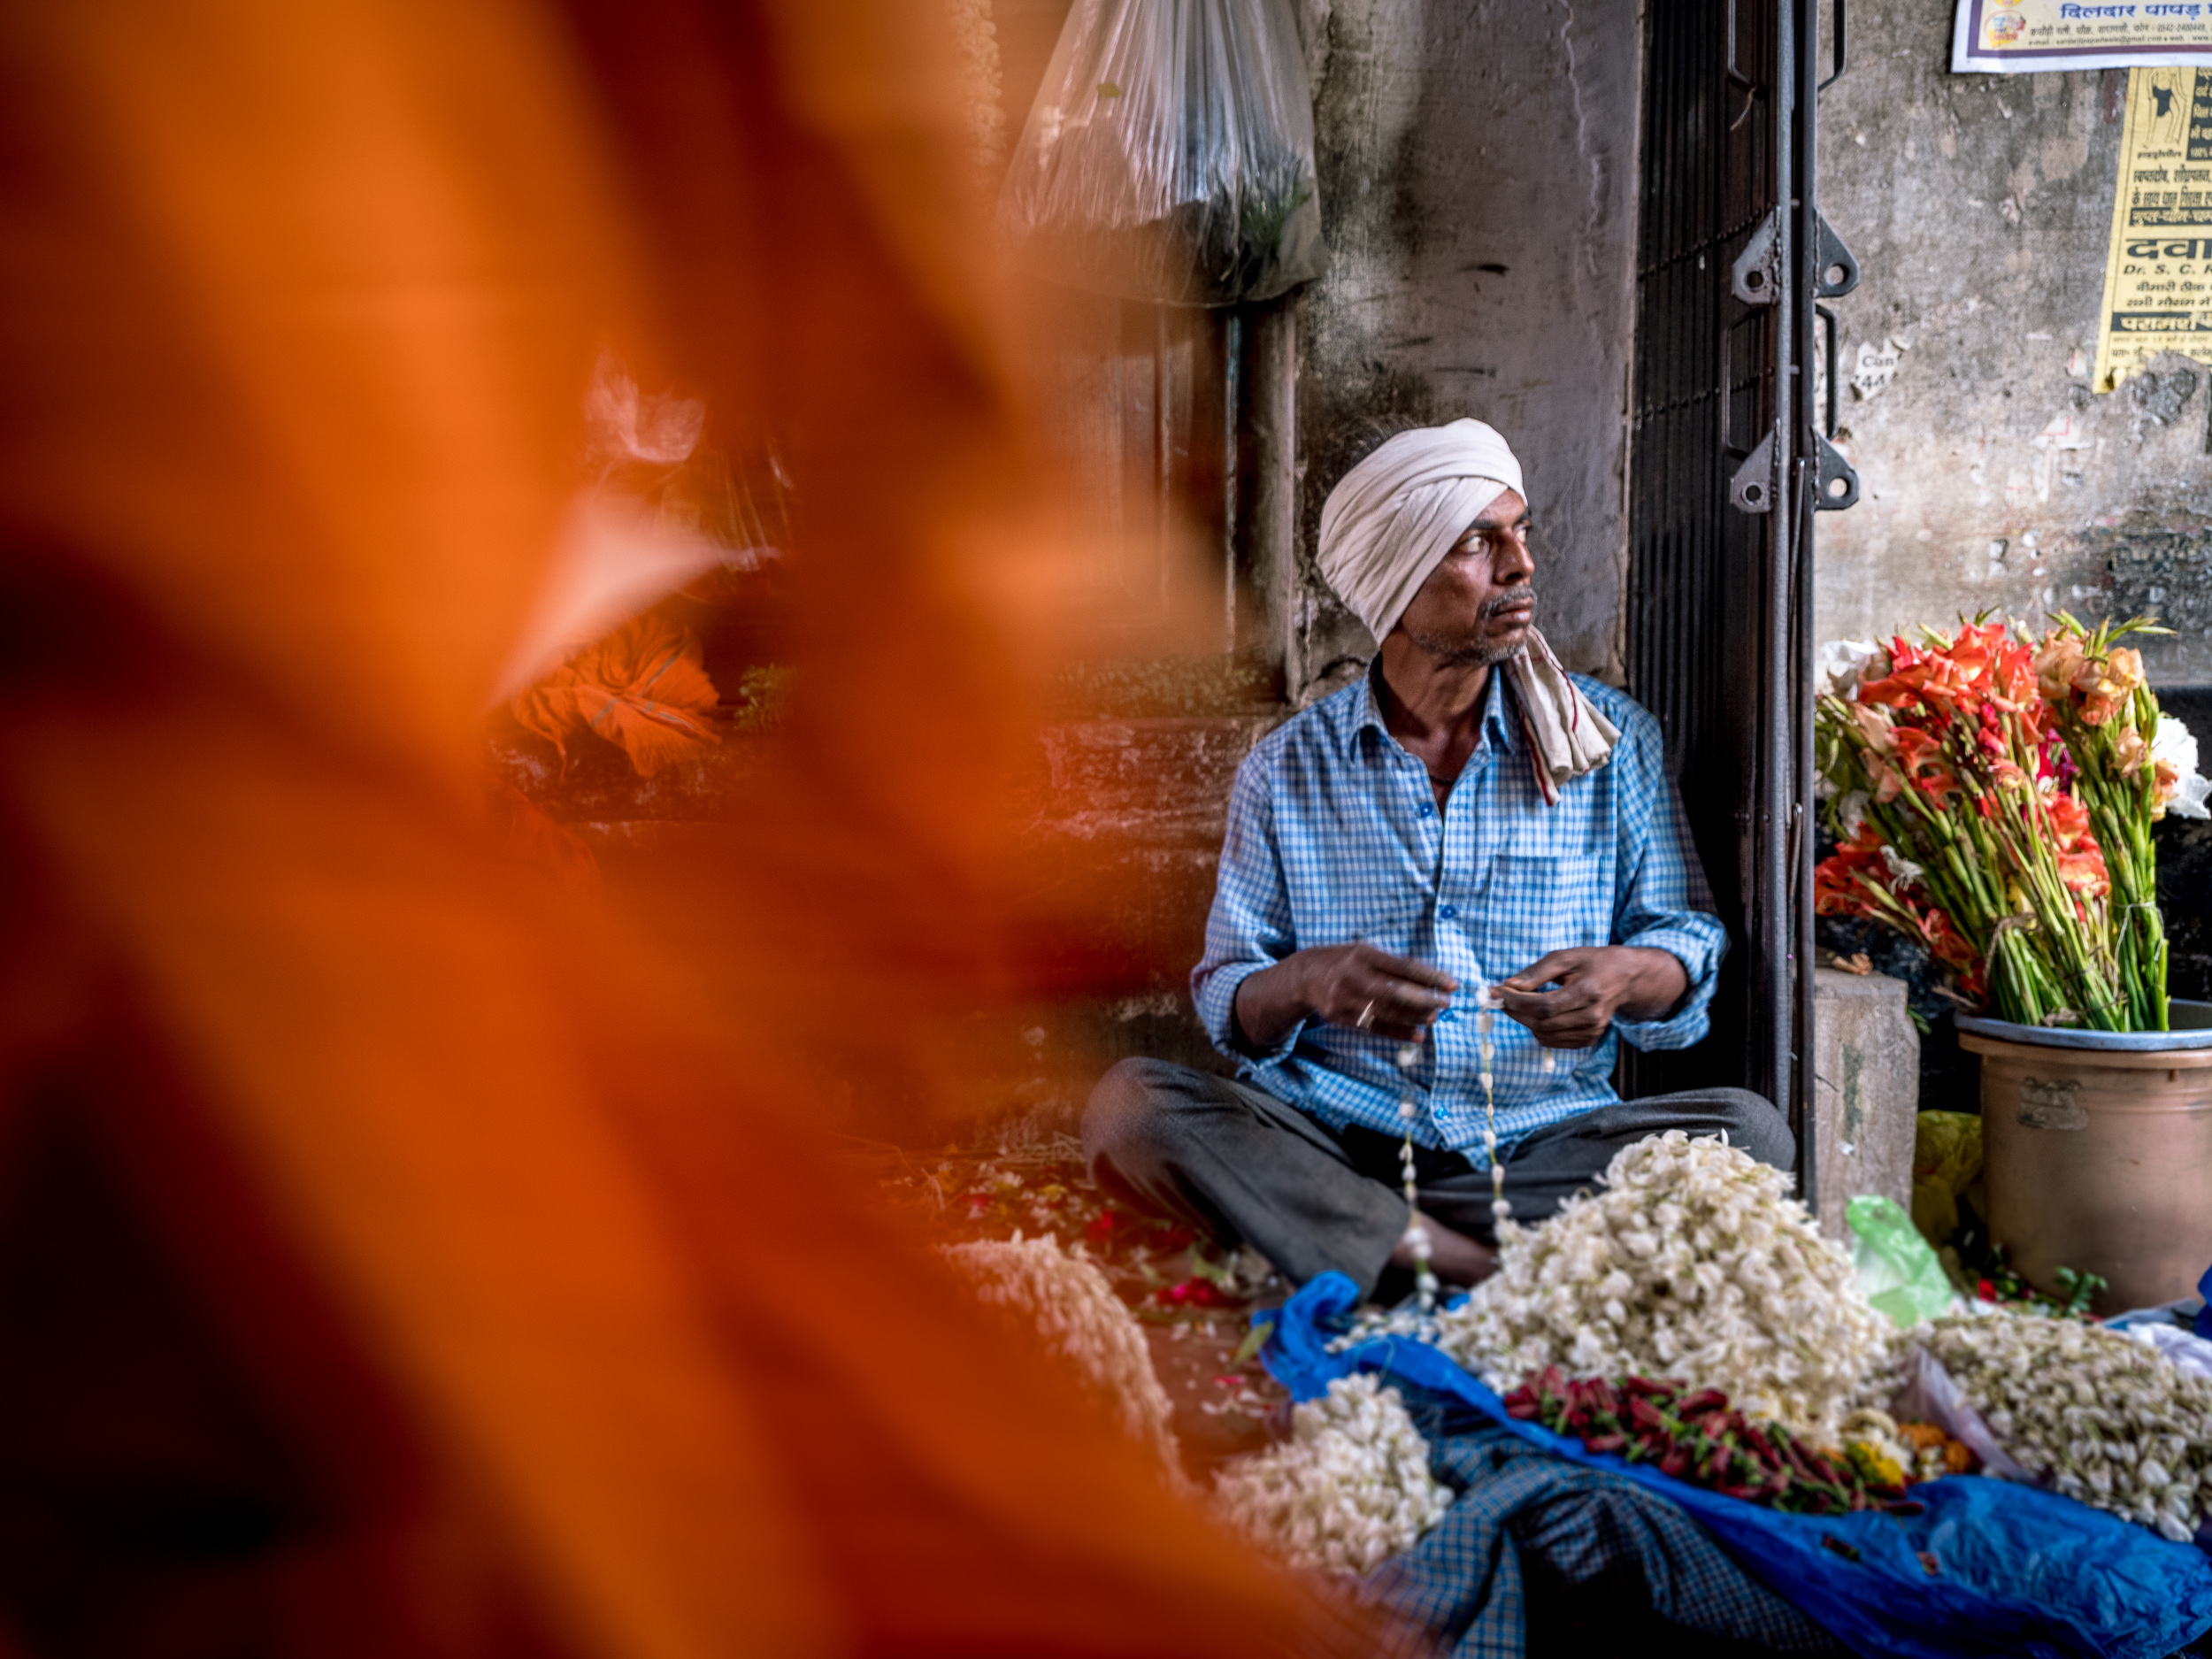
Kolkata. Rickshaw wallah on a chai break. Fujifilm GFX 50S, Godox AD600, SMDV Alpha 70 Speedbox.

Kolkata: A sadhu photographed with the iconic Howrah bridge as a backdrop. Fujifilm GFX 100, Godox AD200 Pro, SMDV Alpha 110 Softbox.
i always like it when a company listens to their users. It’s one of the reasons why I like working with Fujifilm so much, and also with Compagnon. Along with a couple of other users, I had told them that I thought the roll-top compartment needed an extra way of securing it in addition to only the buckle and low and behold: their next backpack, the Element, which is currently on Kickstarter.com, along with two sling bags, will have a velcro strip to seal off the roll-top compartment.
I’m looking forward to putting the Element through its paces as well and comparing it to the Explorer+.
Disclaimer: I’m a brand ambassador for Compagnon Bags. As such, Compagnon will occasionally send me a bag to review. Given the fact that I have a zillion other bags in my closet, the real test for me is: ‘Do I keep using the bag after I’ve reviewed it or do I send it back?’ In this case, it looks like I’ll be using the Compagnon Explorer+ for quite a few trips to come, as I really like it, especially with the small modification that I talk about in the video.
Tips & Deals, part 2: watch three videos of my 'Learn Lightroom Classic in 2.5 hours' course for free
Until the counter hits 0, you can…
… watch three videos from my ‘Learn Lightroom Classic in 2.5 hours’ course for free (scroll down)
… save 50 percent on the course if you like what you see
… save 60 percent of my ‘Lightroom & Photoshop Masterclass’ bundle
Save 50% on ‘Learn Lightroom Classic in 2.5 hours’

Learn Lightroom the right way
✔︎ understand how Lightroom is different from other editing software like Photoshop
✔︎ learn a failsafe way to importing images
✔︎ discover my tried and true best practices for file and folder management
✔︎ unlock the essential develop module tools
✔︎ master the export dialog to share your images
✔︎ this course is fully downloadable. Buy it now and watch it when you like, where you like and for as long as you like!
Watch 3 videos from the course, absolutely free
The problem with digital downloads is that often, you’re buying something completely unknown. Sure, a course might have some great reviews (I know mine does) but even then, you don’t know how and if the teacher’s style will resonate with you. That’s why I’m giving you the opportunity to watch three videos (in addition to the trailer video) for free, until the timer above hits zero. So, instead of watching ‘A Christmas Carol’ for the umpteenth time, do your Lightroom skills a favour. Like what you see? Then get the entire course at 50 percent off!
Below is video #3, in which I give some ‘best practices’ advice for setting up Lightroom and your hard drives for optimum success. My recommendations are based on ten years of working with real life students.
Below you can watch video #8 of the course, which is all about Collections. Collections are probably the best organisational tool since the invention of the ordner and the drawer in 312 BC. I use Collections all the time and if you don’t, I’m sure you will after watching this video!
In this final excerpt (Chapter #13 from the course), I teach you all you need to know about the Adjustment Brush in Lightroom Classic. And those strange marks on the image, you ask? That’s me explaining the difference between Flow, Opacity and Density! Check it out :-)
“It’s caffeine for my processing! Immediately useful and easy to follow; you may finish in one sitting because you’re engaged. Don’t open Lightroom without this.
”
Interested in even bigger savings?

Tips & Deals, part 1: how to add a texture in Photoshop
Until the counter hits 0, save
… 50% on my individual high-resolution Texture Packs
… 60% on the bundle of all three packs


This week, I’ve got a couple of cool deals up my digital sleeve for you but I also want you to learn a technique or two. That’s why every deal I post will also come with a free video for you to watch!
Today’s deal is that you can get each of my three high resolution texture packs at 50 percent off and the three pack bundle even at 60 percent off!
> Piet’s Texture Pack, Vol. 01. Get it here for only $13.75 instead of $27.50
> Piet’s Texture Pack, Vol. 02. Get it here for only $13.75 instead of $27.50
> Piet’s Texture Pack, Vol. 03. Get it here for only $13.75 instead of $27.50
> Piet’s Texture Pack, Vol. 01, 02 en 03 bundle. Get it here for only $35 instead of $82.50
This is an ideal opportunity to stock up on some high resolution textures I photographed with the Fujifilm GFX 50S or the GFX 100 all around the globe. With camera resolutions increasing rapidly, your existing texture library might be getting a bit too low-res, don’t you think? Another great thing about these super high-res textures is that you can decide on using just a crop instead of the entire texture.


Above are some samples from the three packs. Bonus-tip: you can layer them on top of each other with different blending modes in Photoshop to come up with entirely new combinations!
You don’t need a discount code! The prices already reflect the discount… but they go up again when the timer hits zero!
Watch how you can use textures to change any dull mid-grey backdrop into something completely different.
In the video below, I’ll show you how I use textures to spice up the background in a portrait shoot. You’ll learn…
How to work with the Quick Selection tool in Photoshop;
Working with blending modes and layer masks;
Working with curves adjustment layers and clipping masks;
Working with smart filters